19 November 2014

Little bits of sewing


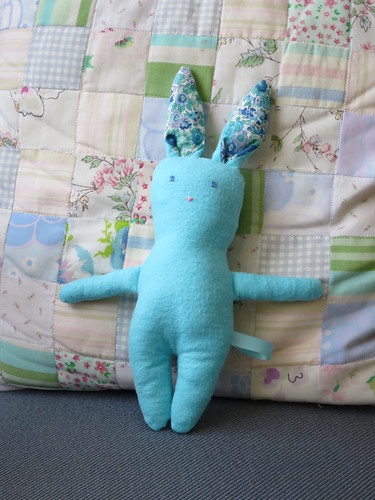
Elliott Bunny

I've done some small sewing projects of late. The most significant is a new bunny because we are expecting a new small person in the spring. The Wee Lass is super excited to be a big sister and helped stuff the arms and picked out the lining fabric for the ears (it's a Liberty print).


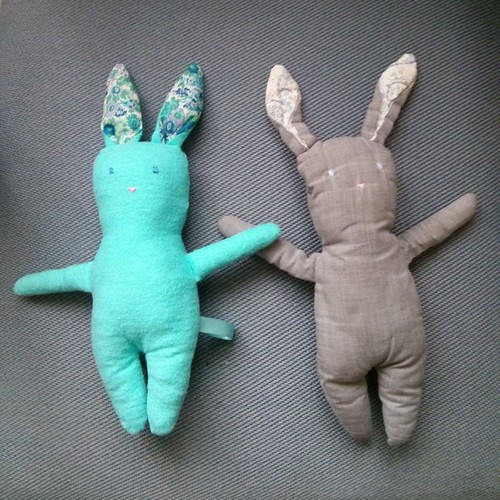
Elliott and Oscar

The new bunny is named Elliott, after the source of the body fabric, just like Oscar. Here they are together, Oscar looking very well-loved (and oft-laundered) compared to Elliott, who is patiently waiting for his little person.


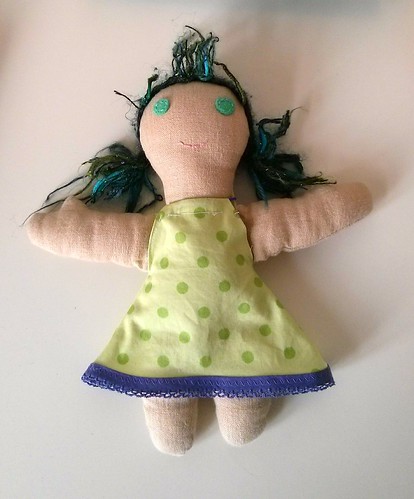
Zoe in her dress

The Wee Lass and I also made a dress for Zoe, the dolly we made together some time ago.


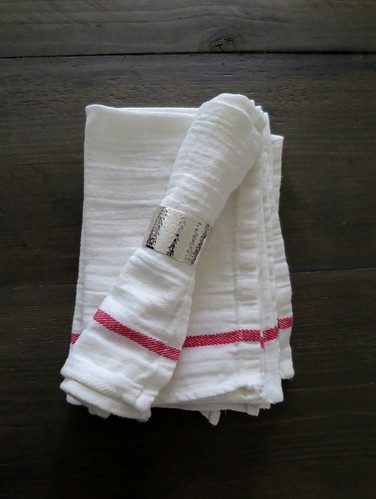
cloth napkins

On a more practical note, I recently made some cloth napkins from IKEA tea towels. I just cut the (39-cent) tea towels in half and hemmed the raw edge. I got the idea here. I chose to wash, dry, and iron before cutting in half and hemming, but it was still a super quick and satisfying project to add a few more napkins to our stack.

Photographs and artwork by Allison Gryski. © All rights reserved.

05 October 2014

Sewing in the last year

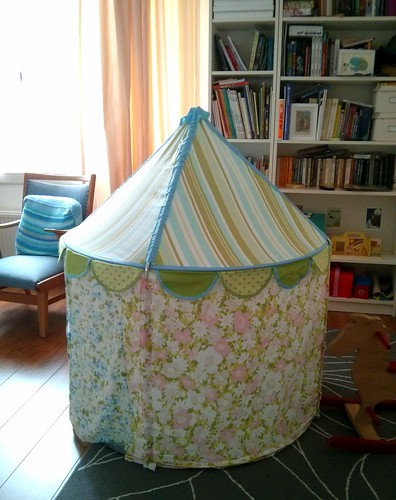
The last year was not a prolific sewing year, but I did do one BIG project and one small project that have seen a lot of play. The first was a makeover of the IKEA play tent. I followed this tutorial and found it super helpful.


play tent

To be honest, this project took me well out of my sewing comfort zone. I don't really like working with huge pieces of fabric (having to lay them out on the living room floor was the only option and not convenient) and sewing around the hoop frames was tricky (at least on my machine). I do need to do a couple small fixes, nearly a year after "completing" the tent. I was way too generous with the height of the fabric walls because I was concerned about not having enough to attach well and as a result, the tent has a tendency to shift and list to the side. I also need to add in some seams that I foolishly skipped in the top that act as stoppers for the tent poles. The Wee Lass has not found these minor issues to interfere with playing, but it definitely needs stitching by hand at some point.


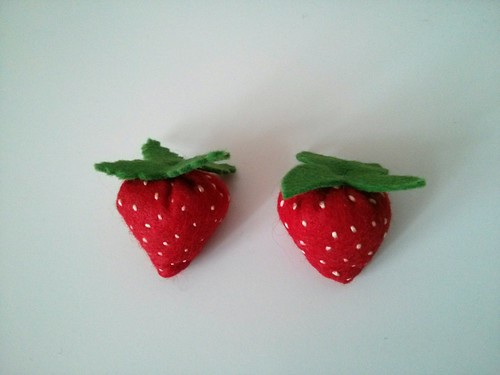
felt strawberries

The other project was some small felt play food strawberries. Embroidering all the seeds (which I did before stuffing and sewing) took an obscenely long time, but the result is adorable. Here's the tutorial that I followed.


Photographs and artwork by Allison Gryski. © All rights reserved.

29 September 2014

Cinnamon Apple Scone Recipe


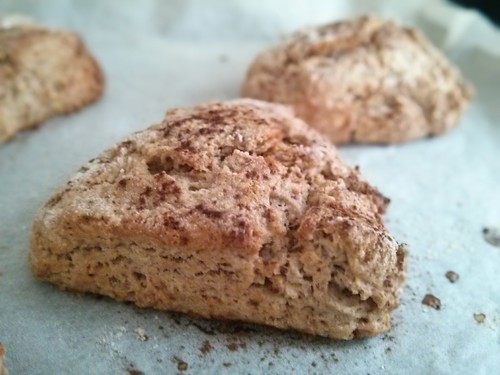
Cinnamon Apple Scones
It was a grey, drippy afternoon, so the Wee Lass and I decided to bake something tasty for our afternoon snack. She really wanted cinnamon buns, but we didn't have time to wait for rising, so we made scones instead. We modified our recipe to make them a bit cinnamon-bun-inspired.


Cinnamon Apple Scones
Makes 6-8 scones
  • 2 cups flour
  • 1/4 cup brown sugar
  • 2 tsp baking powder
  • 2 tsp cinnamon
  • 1/4 tsp salt
  • 1/3 cup butter (cold)
  • 1/2 cup milk
  • 1 egg
  • 1 small apple (peeled and grated)

Pre-heat your oven to 190°C.

Mix the dry ingredients in a mixing bowl, then cut in the butter until you have fine crumbs. Don't worry if there's the odd larger bit as this will just make your scones flakier. Mix in the grated apple (we used a Royal Gala). Add the egg and milk, and mix to make a dough. Don't overmix it or the scones will not be as tender.

Flour your counter top or a large cutting board and pat your dough out into a circle about 2 cm thick. Cut it into 6-8 wedges and put on a parchement paper lined baking sheet. Sprinkle the tops with a bit more cinnamon. Bake for 15-20 minutes, until just slightly browned on top.

Best eaten warm with a generous slather of butter!

You can find more of my recipes in the Food section, in the tabs along the top.

Photographs and artwork by Allison Gryski. © All rights reserved.

03 September 2013

Blackout Poetry


popular art
I've been experimenting with some "blackout poetry" recently. You take some random paper-based text (e.g. a newspaper, magazine, whatever) and black out words until what you're left with is a poem or amusing sentiment. The one above reads: "popular art must be nourishing to people. the absolute ideal art form to sum up the world. explicitly."

Since I don't have much random English text available, I bought a cheap paperback (Sophie's World) at my beloved thrift store and have been destroying it for Art and Poetry. So much fun!


everyday life

You can see my whole set of blackout poetry on flickr. I don't think I'm done with this yet. It's a challenging constraint to play with.


doubts went even deeper


Photographs and artwork by Allison Gryski. © All rights reserved.

30 August 2013

10 things


Jellyfish at the Vancouver Aquarium

There's not been much time (or energy) for making things lately, but I'm hoping once the Wee Lass starts preschool (so soon!) that I will find a new rhythm that includes more creative work. In the meantime, here's some things to keep you amused on a Friday afternoon:

Liberate your palate.

Geeky latte art.

I'd love to take the Wee Lass to Hamburg to see this fun thing.

Interesting photo series of four sisters (as adults) over the course of 36 years. (via Making it Lovely).

How "computer geeks" replaced "computer girls".

Scientific proof that I'm not just an old lady for disliking noise.

Interesting interviews with American expat parents around the world.

Math, doodling, and stream of consciousness ponderings.

An illustrated Bill Watterson quote done in the Calvin & Hobbes style.

How to eat a bacon sandwich.

Photographs and artwork by Allison Gryski. © All rights reserved.

23 August 2013

10 things


10

Awesome and subversive short documentary by a 4th grader. (via Cup of Jo).

Funny. Fascinating.

Beautiful photos of everyone's favourite city... Paris of course.

How to get a 5 year old to sit still and concentrate for 4 hours.

I love my new Springcourt sneakers, which are soooo much more comfy than my cute, but insole-less Bensimons. Also, John Lennon wore a pair on the cover of Abbey Road.

I want to make some of these for our dining table.

Images are being set free. Go make something astounding!

100 Ideas. You know, in case you were at a loss for what to do this weekend.

What Ira Glass has to say about Good Taste. Reassuring, isn't it?

Amazing photo series of ballet dancers set in the real world.


Photographs and artwork by Allison Gryski. © All rights reserved.

20 August 2013

Tutorial: How to make simple bead bracelets (with a toddler)


Pony bead bracelet

The Wee Lass and I recently spent a fascinating (to use her word) afternoon making some bead string jewellery. Our method is easy for a toddler to do nearly independently. Given the small size of the beads, use your common sense if your child is ready to do an activity like this or not. Share pictures of your creations in my flickr group.

Materials:
-cord elastic
-plastic "pony" beads
-small dish or container for the beads

Of course you can make bead bracelets with just about any string-like material and anything with a hole in it (macaroni necklaces are a classic!), but these materials are easy and appealing to use. The cord elastic is stiffer than twine, yarn, or string, meaning it's easier to thread a bead onto and because it's stretchy, you won't need any fasteners.

"Pony" beads come in a variety of fun colours, they are inexpensive, and they have large holes, making them easy for a toddler to thread onto the cord.


Step 1: Measure
Measure a length of the elastic that fits appropriately for a bracelet or necklace, then add a couple inches extra for tying it together at the end. It's better to have it a bit too long and trim the excess after you tie the knot than to struggle with tying it off.


Step 2: Set it up
Tie a slip knot in one end, using up at least 1 inch. You want to "save" some of the elastic so you have some free to tie it up with at the end. I also put a safety pin through the elastic by the knot to ensure no beads can slip off.


Step 3: Hand it over
At this point, it's ready for your small person to start stringing beads.


If they're doing a long string, you might add a safety pin part way through the beading process to ensure the beads already on won't slip off if they pick it up from the wrong end. I think losing some beads is inevitable. The Wee Lass was pretty zen about re-doing her work, but I can imagine some toddlers might have a meltdown if they dump off their whole string by accident. Just pin through the fabric elastic casing near the current top bead.


Step 4: Tie it up
Once they get to about an inch or two from the end, it's time to tie it off. Undo the slip knot in the bottom of the string and remove any safety pins. Holding the two ends together, stretch the elastic a bit and tie a knot as close as you can to the beads. Double check the size and then snip off the tails if they're too long.


bracelet and necklace by The Wee Lass


Photographs and artwork by Allison Gryski. © All rights reserved.