03 September 2013

Blackout Poetry


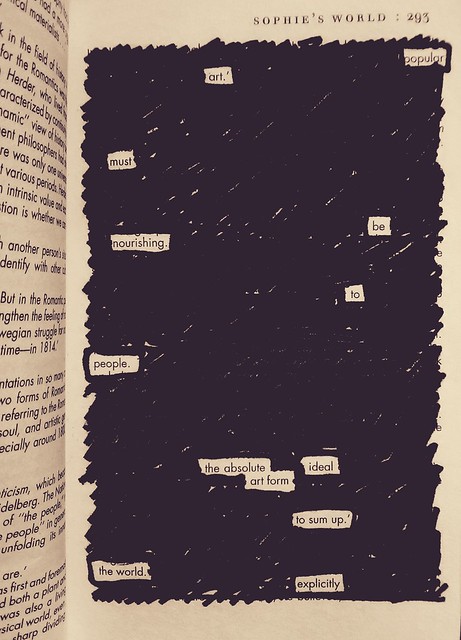
popular art
I've been experimenting with some "blackout poetry" recently. You take some random paper-based text (e.g. a newspaper, magazine, whatever) and black out words until what you're left with is a poem or amusing sentiment. The one above reads: "popular art must be nourishing to people. the absolute ideal art form to sum up the world. explicitly."

Since I don't have much random English text available, I bought a cheap paperback (Sophie's World) at my beloved thrift store and have been destroying it for Art and Poetry. So much fun!


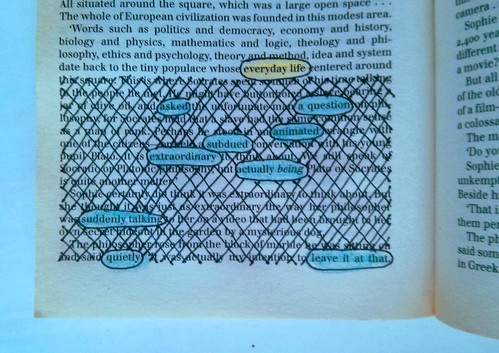
everyday life

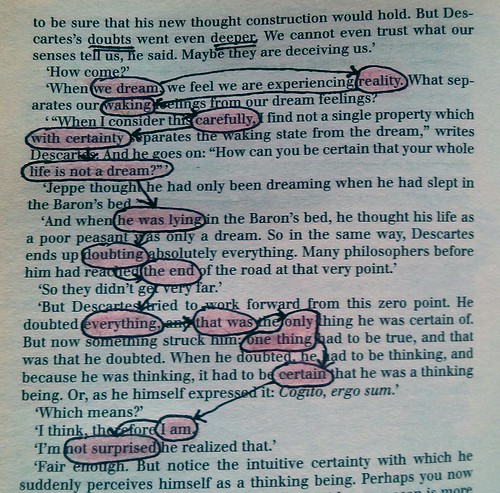
You can see my whole set of blackout poetry on flickr. I don't think I'm done with this yet. It's a challenging constraint to play with.


doubts went even deeper


Photographs and artwork by Allison Gryski. © All rights reserved.

30 August 2013

10 things


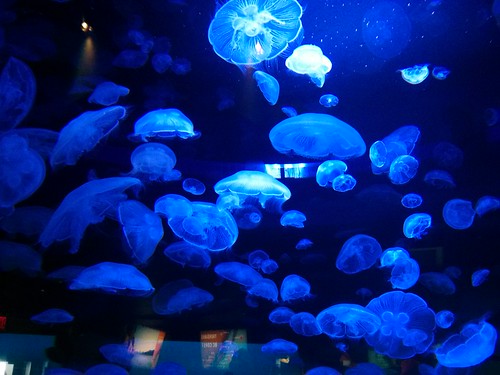
Jellyfish at the Vancouver Aquarium

There's not been much time (or energy) for making things lately, but I'm hoping once the Wee Lass starts preschool (so soon!) that I will find a new rhythm that includes more creative work. In the meantime, here's some things to keep you amused on a Friday afternoon:

Liberate your palate.

Geeky latte art.

I'd love to take the Wee Lass to Hamburg to see this fun thing.

Interesting photo series of four sisters (as adults) over the course of 36 years. (via Making it Lovely).

How "computer geeks" replaced "computer girls".

Scientific proof that I'm not just an old lady for disliking noise.

Interesting interviews with American expat parents around the world.

Math, doodling, and stream of consciousness ponderings.

An illustrated Bill Watterson quote done in the Calvin & Hobbes style.

How to eat a bacon sandwich.

Photographs and artwork by Allison Gryski. © All rights reserved.

23 August 2013

10 things


10

Awesome and subversive short documentary by a 4th grader. (via Cup of Jo).

Funny. Fascinating.

Beautiful photos of everyone's favourite city... Paris of course.

How to get a 5 year old to sit still and concentrate for 4 hours.

I love my new Springcourt sneakers, which are soooo much more comfy than my cute, but insole-less Bensimons. Also, John Lennon wore a pair on the cover of Abbey Road.

I want to make some of these for our dining table.

Images are being set free. Go make something astounding!

100 Ideas. You know, in case you were at a loss for what to do this weekend.

What Ira Glass has to say about Good Taste. Reassuring, isn't it?

Amazing photo series of ballet dancers set in the real world.


Photographs and artwork by Allison Gryski. © All rights reserved.

20 August 2013

Tutorial: How to make simple bead bracelets (with a toddler)


Pony bead bracelet

The Wee Lass and I recently spent a fascinating (to use her word) afternoon making some bead string jewellery. Our method is easy for a toddler to do nearly independently. Given the small size of the beads, use your common sense if your child is ready to do an activity like this or not. Share pictures of your creations in my flickr group.

Materials:
-cord elastic
-plastic "pony" beads
-small dish or container for the beads

Of course you can make bead bracelets with just about any string-like material and anything with a hole in it (macaroni necklaces are a classic!), but these materials are easy and appealing to use. The cord elastic is stiffer than twine, yarn, or string, meaning it's easier to thread a bead onto and because it's stretchy, you won't need any fasteners.

"Pony" beads come in a variety of fun colours, they are inexpensive, and they have large holes, making them easy for a toddler to thread onto the cord.


Step 1: Measure
Measure a length of the elastic that fits appropriately for a bracelet or necklace, then add a couple inches extra for tying it together at the end. It's better to have it a bit too long and trim the excess after you tie the knot than to struggle with tying it off.


Step 2: Set it up
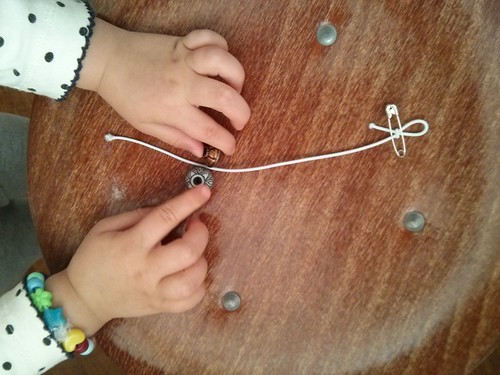
Tie a slip knot in one end, using up at least 1 inch. You want to "save" some of the elastic so you have some free to tie it up with at the end. I also put a safety pin through the elastic by the knot to ensure no beads can slip off.


Step 3: Hand it over
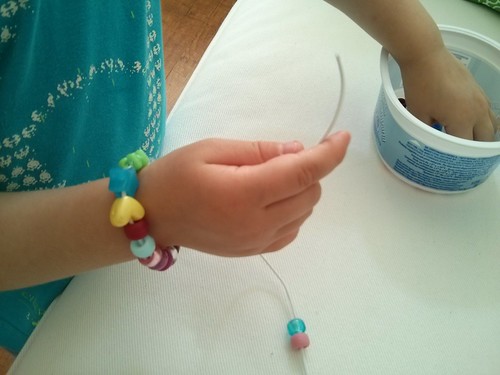
At this point, it's ready for your small person to start stringing beads.
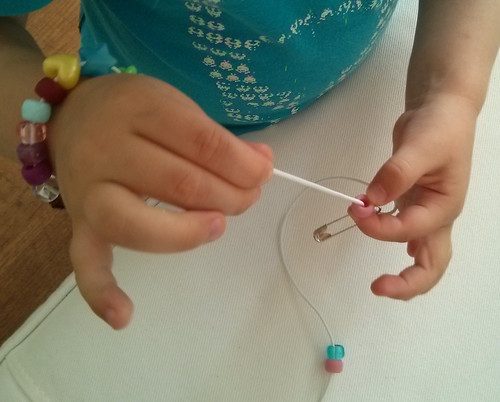


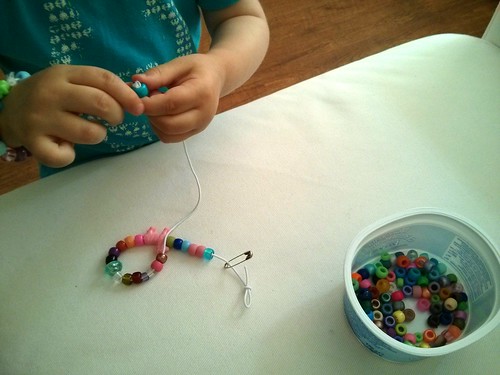
If they're doing a long string, you might add a safety pin part way through the beading process to ensure the beads already on won't slip off if they pick it up from the wrong end. I think losing some beads is inevitable. The Wee Lass was pretty zen about re-doing her work, but I can imagine some toddlers might have a meltdown if they dump off their whole string by accident. Just pin through the fabric elastic casing near the current top bead.


Step 4: Tie it up
Once they get to about an inch or two from the end, it's time to tie it off. Undo the slip knot in the bottom of the string and remove any safety pins. Holding the two ends together, stretch the elastic a bit and tie a knot as close as you can to the beads. Double check the size and then snip off the tails if they're too long.
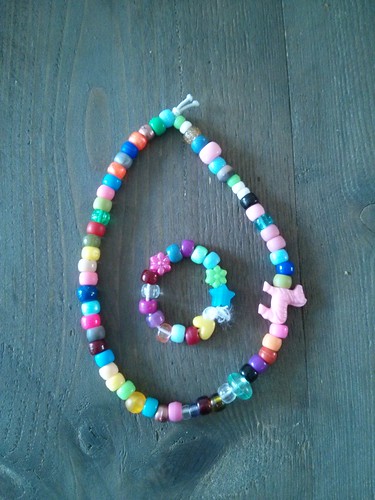

bracelet and necklace by The Wee Lass


Photographs and artwork by Allison Gryski. © All rights reserved.
16 August 2013

This and that for weekend browsing


St. Michael's Cathedral in Kiev

We've been off on an adventure, attending YAPC::EU in Kiev, so I only have a couple links for this weekend...

The new IKEA item that I'm coveting.

A vegan chocolate cake that you mix in the pan. (no dishes and nearly guilt-free!)

How to make goldfish crackers.

Infographics are fun.


some striking signage in Kiev

Photographs and artwork by Allison Gryski. © All rights reserved.
09 August 2013

Wishing you a weekend of lovely sounds


Bumblebee

I thought I'd leave you with a few things to listen to this weekend ...

A great song by a French ensemble that I've been dancing to with the Wee Lass.

My favourite spoken word piece ... it's about bottled water.

An awesome cover that totally re-imagines the original.

This song has beautifully poetic lyrics.

A song that always makes me miss Montreal exquisitely.

My favourite TED Talk on creativity.


Photographs and artwork by Allison Gryski. © All rights reserved.
04 August 2013

The Most Delicious Panzanella


Panzanella

One of our favourite easy dinner dishes this summer has been panzanella. It's quick to make, refreshingly cool on a hot day, and it gets gobbled up by the Wee Lass.

Here's how I make it for 2 adults and 1 toddler ...

Most Delicious Panzanella
stale bread (good quality crusty French or Italian style bread, approximately 1 cup per person when cubed)
3 fresh tomatoes (approximately 1 per person your salad will serve)
1/2 fresh cucumber (optional)
1/2 to 1 can of diced tomatoes (optional -- desirable if your bread is rock solid stale)
4 Tbsp olive oil (really just a generous glug ... I don't actually measure it)
2 Tbsp balsamic vinegar (or red wine vinegar or cider vinegar)
garlic (1 clove)
shallot (optional)
capers
Taggia olives
assorted fresh herbs (basil, thyme, oregano)
salt and pepper

Saw the stale bread into small bite-size cubes and place in a shallow salad bowl or deep pie dish. I used the end of a loaf of rosemary foccaccia. If your bread is really stale, you'll want to make sure it all gets thoroughly soaked, so that's why a shallow dish works better. Now you're going to make a juicy concoction to dump on top. You could mix it in a separate bowl first, but I always just add it to the bread as I go.

Finely chop your tomatoes (and cucumber if you're using it) into small cubes. If your bread is super stale, then add a can of diced tomatoes for extra liquid and tomatoe-y goodness (I didn't need it in this case). Drizzle on a generous amount of olive oil (use a bit more if your bread is really hard) and add the balsamic vinegar. Mix this sauce around to combine. You can add finely chopped garlic and shallot directly, but I prefer to soften the flavour of it with a quick saute. I actually forgot to add it in the pictured salad and the whole thing was still tasty.

Add a bit more olive oil if it seems like a good idea. Toss in a big spoonful of capers and enough olives for everyone to get at least 3 or 4. Finely chop a generous bunch of fresh basil, thyme, and oregano and add to your bowl. Sprinkle with sea salt and freshly ground black pepper. Mix it and let it sit for 5 minutes before serving.


Panzanella

Photographs and artwork by Allison Gryski. © All rights reserved.

02 August 2013

Web Wanderings for the Weekend


A fresh batch of playdough

Some of my favourite things from wandering around the web...

A must-make recipe for anyone with a toddler. We make 1/4 batch at a time.

You don't have to be pretty.

Be kind.

A cute tip for improving your french accent.

The sweetest nightlight.

My current favourite book to read to the Wee Lass.

Utterly astounding book sculptures.

Quirky idea for taming cable clutter.


Photographs and artwork by Allison Gryski. © All rights reserved.
Haiku Postcard


haiku postcard
An awesome friend of mine suggested doing a haiku postcard exchange. This is what I came up with. I have forgotten everything I learned about my watercolour paints, so come September (and the Wee Lass begins preschool), I have artsy plans for myself.

Here's a sketch I did as part of the series of motherhood inspired haikus:

motherhood

Photographs and artwork by Allison Gryski. © All rights reserved.
28 July 2013

Wanderings on the web


Summer in a bowl
A few things I've run across lately....

A scientific approach to making your favourite type of chocolate chip cookie.

The most amazing food blog that I've read in ages.

A genius (if extreme) method for finding your style. If nothing else, it's highly entertaining to read about someone else doing it.

What I'm eating for breakfast these days. Except I use raspberries.

A music video about geek girls. I played RPGs growing up, read scifi/fantasy, and got a B.Math in Computer Science. I am a proud geek.

Chic bicycle adventures to take around the world.

Photographs and artwork by Allison Gryski. © All rights reserved.

18 July 2013

There was one with polkadots.

When there's not much time for sewing projects, I tend to stick to the highly functional ones. A book bag for library visits and a zip pouch for spare toddler clothes are two recent-ish projects.


Book Bag

The book bag is a lined tote with a pocket on the inside. I love the cute gnomes and woodland creature fabrics available in Holland and they paired well with a classic red and white spotted fabric.


Book Bag (inside out)

For the zip pouch, I used some exotic fabric from a bundle of fat quarters and some tiny white on blue polkadots for lining. It really should have been wider, but I wanted to work with what I had on hand and all my zippers were short. It's just big enough to fit one change of clothes for the Wee Lass, but I will probably make another one when I have a chance to pick up some longer zips.


Zip Pouch

I don't tend to sew from a pattern, so I just made both of these up as I went along and using materials that I already had. Given my time constraints for crafty projects, having a good stash of stuff has been invaluable. I try to keep a nice variety of ribbons, elastic, zippers, snaps, and embellishments around so that I don't have to delay a project by going shopping for supplies. This can also lead to some delightful serendipity. I am so pleased with how Zoe's slightly wild blue-green hair turned out and it occurred largely because I didn't have any leftover yarn in a more conventional colour.

Photographs and artwork by Allison Gryski. © All rights reserved.

08 July 2013

And then we made a Dolly.


Zoe the doll
The Wee Lass and I made a fabric dolly together. She's very interested in my sewing machine and frequently asks to do a sewing project. We used tea to dye some linen from a thrifted shirt (we needed only a small part of one arm of the shirt for this dolly).


I drew a pattern on paper based roughly on the shape of her bunny (amusingly, also made from a thrifted shirt) and then traced around it to add seam allowance. I made the arms a bit fatter (easier to flip and stuff) and added thumbs. We sewed up the arms and legs together and stuffed them full of "fluff" as she calls it. I added felt eyes and a mouth with some embroidery thread before sewing the body up and attaching the arms and legs. I attached a little loop of embroidered trim so we could easily clip the dolly to a bag or the stroller if she's coming out on adventures.


I added yarn hair, based on a simple tutorial that I found online. Since our dolly didn't have a perfectly round head, I found it worked better to start the "scalp" at the hairline and then spiral in, rather than the reverse. I wove in the loose ends of the braid to fill any gaps and secure it. I just added a little bit of long yarn hair to make pigtails and bangs, rather than covering the whole head.


This type of "flat" doll is quite approachable for a novice sewist and lots of fun to involve a little one in the process. Next time the Wee Lass requests a sewing project, I think we'll make her dolly a dress.


Photographs and artwork by Allison Gryski. © All rights reserved.

31 March 2013

Raspbery variation


Raspberry Nanaimo Bar
I love homemade Nanaimo Bar and every now and then I get a serious craving. A while back, I decided to experiment with making a raspberry version. I just added some (thawed) frozen raspberries to the icing layer. It made it pretty and pink and it was so yummy.

Photographs and artwork by Allison Gryski. © All rights reserved.

21 March 2013

Lost Buttons


lost buttons

I like to pick up lost buttons on the street. These are the ones I've found so far. I started shortly after moving to Amsterdam. I think one or two may have been picked up while on holiday, but I decided early on that I couldn't be bothered to keep track of where each button was found. I was not surprised to discover that more than half of the buttons I've found are black. There are 3 metal buttons and 2 wooden ones. The purple heart-shaped one is the only non-circle I've found. Do you collect anything unusual?

Photographs and artwork by Allison Gryski. © All rights reserved.