Showing posts with label fabric. Show all posts

18 July 2013

There was one with polkadots.

When there's not much time for sewing projects, I tend to stick to the highly functional ones. A book bag for library visits and a zip pouch for spare toddler clothes are two recent-ish projects.


Book Bag

The book bag is a lined tote with a pocket on the inside. I love the cute gnomes and woodland creature fabrics available in Holland and they paired well with a classic red and white spotted fabric.


Book Bag (inside out)

For the zip pouch, I used some exotic fabric from a bundle of fat quarters and some tiny white on blue polkadots for lining. It really should have been wider, but I wanted to work with what I had on hand and all my zippers were short. It's just big enough to fit one change of clothes for the Wee Lass, but I will probably make another one when I have a chance to pick up some longer zips.


Zip Pouch

I don't tend to sew from a pattern, so I just made both of these up as I went along and using materials that I already had. Given my time constraints for crafty projects, having a good stash of stuff has been invaluable. I try to keep a nice variety of ribbons, elastic, zippers, snaps, and embellishments around so that I don't have to delay a project by going shopping for supplies. This can also lead to some delightful serendipity. I am so pleased with how Zoe's slightly wild blue-green hair turned out and it occurred largely because I didn't have any leftover yarn in a more conventional colour.

Photographs and artwork by Allison Gryski. © All rights reserved.

16 November 2012

Tutorial: Fabric Bunting


Fabric Bunting

I made some bunting not too long ago and took pictures of the process. So here is a tutorial for how to sew some for yourself. It's pretty, it's easy, and it's great if you have lots of small bits of fabric from other projects that need using up.

Materials:
-assorted fabrics
-bias tape
-pinking shears
-piece of scrap cardstock or paper

Step 1: Make a flag template

I made a template to trace out of some scrap cardstock I had laying about. Don't forget to include seam allowance (1/4" on each side).


Bunting Flag Template

I used the following method: Draw a line of the width of the flag. Find the middle and draw a line down for the length, forming a T. Draw lines connecting the ends of your lines to make your triangle shape. Of course, you don't need to limit yourself to triangles. Scallops or squares are also fun.

Step 2: Cut out your flags


Cutting out Bunting Flag

Cut out pairs of triangles in a variety of fabrics. You can either trace the template onto fabric with a washable fabric marking pen or pencil or cut around it carefully, like I did.


Step 3: Sew each flag


Turning the Flag

Sew each flag with 2 pieces with right-sides together, leaving the top edge open. Trim your seam allowance with pinking shears to make it less bulky. Then flip it right side out, using a blunt knitting needle (or similar object) to poke the point out. The raw top edge will be hidden when you attach it to the bias tape.


Bunting Flags

For beginners, you turn at the point as follows: stop sewing with the needle down through the fabric, then lift up the presser foot and rotate the flag, then put the presser foot back down and continue sewing.

Alternately, you can sew your flags right sides facing out and then edge with decorative bias tape, or trim with pinking shears or do a zig-zag stitch to prevent fraying.

Step 4: Attach your flags to bias tape


Attach flag to bias tape

Pin your flags inside the fold of the bias tape, then sew along the open edge of the tape to attach the flags.

Step 5: Hang your bunting

Ta-dah! Here's my bunting hanging in our living room. If you make some bunting following this tutorial, please share your pictures in my flickr group!


Fabric Bunting


Photographs and artwork by Allison Gryski. © All rights reserved.

14 November 2012

A new project begins


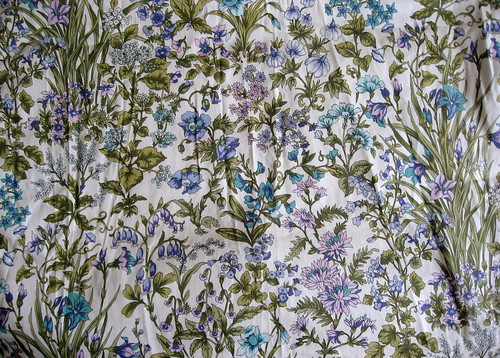
Fabric for a new project

I'm so excited to work on my next project.

I'm doing a makeover of one of these. It's made with hideous material, but it's a fantastic shape and size.

I was inspired by seeing this one.

I plan to use the fabric pictured above, with accents inspired by this patchwork.


Photographs and artwork by Allison Gryski. © All rights reserved.

04 November 2012

Thrifty fabric

I found an old curtain at the thrift store yesterday. It won't stay a curtain as we don't have any windows the right size, but I loved the fabric.


thrifted curtain

It's been awhile since I've found anything for me, though my thrifty luck (and persistence) has been providing splendidly for the Wee Lass (from clothes, to shoes, to toys). There's a ton of fabric in the curtain, but I figure some will end up as a cushion cover or maybe part of a patchwork slipcover for a thrifted armchair.

Photographs and artwork by Allison Gryski. © All rights reserved.

28 November 2011

The time flies by...


Fabric Market Finds


The days have been busy and tiring lately. I've been pondering making a quilt for the Wee Lass and have acquired some new fabric to this end. I'm not sure when I thought I'd have the time or energy, but we shall see...


More Fabric!


I also repaired a bonnet. The old ribbon ties were coming off so I knit a chin strap and added a button from my Jar of Vintage Buttons.


Baby Bonnet Repair


Photographs and artwork by Allison Gryski. © All rights reserved.

13 March 2011

More Fabric Cubes


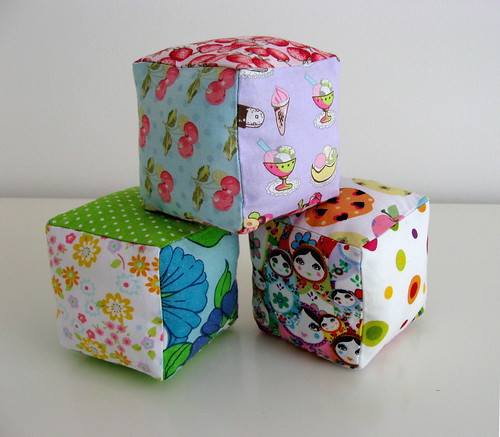
Fabric cubes in a stack


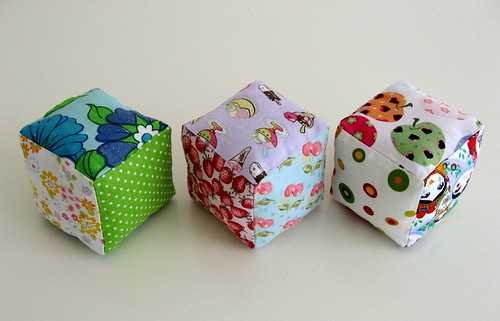
As a thank you for a friend who gave us some adorable and useful baby things, I've made 3 more soft cubes. Her little one is just turning 6 months, so in honour of the exciting first solid food, I've made one of the cubes food themed. The other two I just went for colourful and bright. I hope they end up being fun toys!


Fabric cubes in a line


Photographs and artwork by Allison Gryski. © All rights reserved.

10 February 2011

Fabric Flower Pin

Look what I made! Following this tutorial, I made this pretty, tailored flower pin.


Fabric Flower Pin


It seems a little top heavy for a brooch (maybe I need to pin it with the pin vertical?), but it's definitely cute pinned onto a bag. I just have to figure out how to not squash it when the bag is in use!


Flower Pin on Purse


I made it out of some of the same grey shirt that I used for the bunny and for lining one of my pocket purses. The button in the middle is out of my jar of vintage buttons.


Fabric Flower Pin


Photographs and artwork by Allison Gryski. © All rights reserved.

01 February 2011

Tutorial: How to Sew a Pocket Purse


Pocket Purses


Little button or snap closure pocket purses are endlessly useful. You can tuck a few important things in that you don't want lost at the bottom of a larger bag, use them to store jewellery when travelling, use them for keeping crafty odds and ends tidy, or for any number of other things. You could even use it as a small clutch purse on its own. I've been teaching a friend of mine to sew and she mentioned a desire to make something like this, so I said I'd write a tutorial for one and then we could sew it together.

These are pretty quick to make (if you're not taking photos of every single step) and I probably spend nearly as much time dithering over the button choice as I do actually sewing!

Materials:
  • 1 piece outer fabric (6.5 inches x 12 inches)
  • 1 piece lining fabric (6.5 inches x 12 inches)
  • 1 piece heavyweight interfacing (6 inches x 11.5 inches)
  • 1 button (or snap)

The finished purse is approximately 6 inches by 4.5 inches and it uses 1/4 inch seams throughout.


Pocket Purse Materials


A note on adjusting the size:
You can easily make this purse smaller or larger if you have something specific you want to store in it. Just adjust the initial size of the rectangles, and make sure the interfacing does not include the seam allowance. If you want finished dimensions of W (width) x H (height), cut out your fabric in rectangles of W + 0.5" by (H x 2 + H/2) + 0.5". This should make a pocket purse with a flap that's half the finished height. So, if you want to make a pocket that's 8 x 4 inches (with a 2 inch flap), you would cut your fabric in 8.5" x 10.5" rectangles.


Step 1: Iron interfacing to outer fabric


Interfacing


Iron your interfacing to the wrong side of your outer fabric, leaving 1/4 inch seam allowance on all sides.


Step 2: Sew pocket with outer fabric


Sew outer pocket


With right side facing up, fold the bottom edge of your outer fabric up, so that right sides will be together. The doubled portion should be 4 1/2 inches high, leaving 3 inches showing for the flap. If you want your flap longer or shorter, you can adjust it at this point. Pin the fabric in place and sew up each side of the doubled fabric, leaving the top 1/4 inch free (so just sew alongside the interfacing). Always back stitch at the start and end to secure your sewing.


Step 3: Sew pocket with lining fabric


Sew lining pocket


Repeat Step 2, with the lining fabric. You may want to mark a point 1/4 inch before the end of the doubled fabric since you won't have the interfacing to guide you where to stop. After sewing, snip the bottom corners with pinking shears and iron the seam open, facing in (i.e. just the top part of the seam allowance gets ironed towards the middle, so that it overlaps the pocket).


Finished lining pocket


Step 4: Insert lining


Insert lining


Flip the lining right side out (optionally iron the seams crisp) and tuck it inside the outer fabric. The right sides of your two fabrics should be together. Pin them together, paying special attention to the start of the flap, since the lining fabric will want to curl inwards.


Step 5: Sew across pocket


sew across pocket


Sew the outer fabric to the lining, across the top of the pocket. Just sew alongside the interfacing, making sure that you're only sewing the top two layers. A free-arm sewing machine makes this easiest.


sewing across pocket


Step 6: Sew around flap, leaving opening for turning


move pins to back


Now you're going to sew around the flap, leaving a 3 inch gap in the middle for turning. I found it easiest to flip the pocket over, moving the pins to that side, and to sew following the interfacing. Make an extra strong back stitch on either side of the gap so it can withstand the strain of turning. Be sure to sew all the way down to meet the seams along the lower portion of the sides. Try not to catch the edge of the pocket seam allowance like I did (but don't worry if you do as it will be hidden when the purse is flipped right side out).


sew flap, leave gap


Step 7: Trim and iron


Trim and iron


Trim the corners of the purse with pinking shears and iron back the seam allowance along the top of the flap. This will make hand-sewing the opening easier. (If you plan to use a snap rather than button, I recommend that you iron on a scrap bit of interfacing to the lining on the part of the flap where the snap will go. This will help prevent the snap from pulling too much at the fabric.)


Step 8: Flip purse and sew up opening


Flip right side out


Using the gap that you left un-sewn, flip the purse right-side out. (It will look a bit like a strange hand-puppet until you tuck the lining inside the outer fabric to create your pocket.) Using a ladder stitch, hand sew the opening in the flap closed. Fold the flap down and iron to crease.


Pocket Purse before button


Step 9: Add button or snap


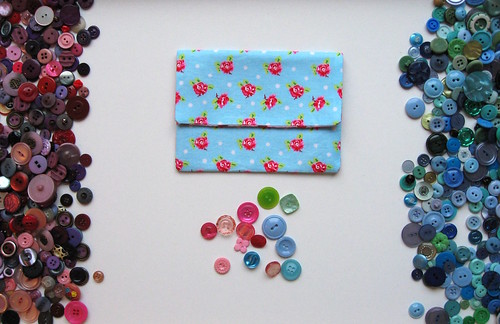
Choosing a button


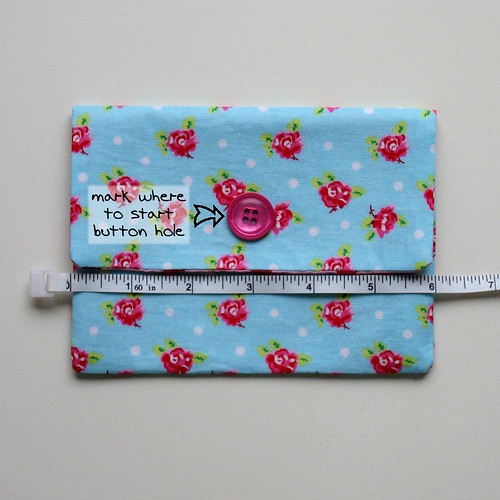
Choose a button (fun, but takes me forever!) and decide where you'd like it placed. Mark discreetly with a fabric pencil and sew a buttonhole in the flap. I always do a tester on scrap fabric first! Hand sew your button in the appropriate place on the pocket. Alternately, you can attach a snap instead of a button, following the directions on the package of snaps.


Mark button placement


If all has gone well, you should now have a cute little pocket purse, ready for all your bits and pieces!

If you make a pocket purse following this tutorial, I'd love to see it! Please add your pictures to my flickr group.


Finished Pocket Purse


Photographs and artwork by Allison Gryski. © All rights reserved.

31 January 2011

Re-using my Dotted Fabric


Cube and Pin Cushion


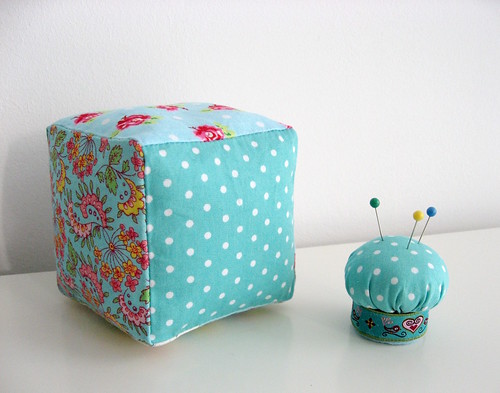
I mentioned that I salvaged the fabric that I'd covered my desk chair in and used some of it in a new project. And here's the "ta da" post! I used a piece for one side of my turquoise fabric cube and another little piece in making a tiny pin cushion. And there's still plenty leftover.


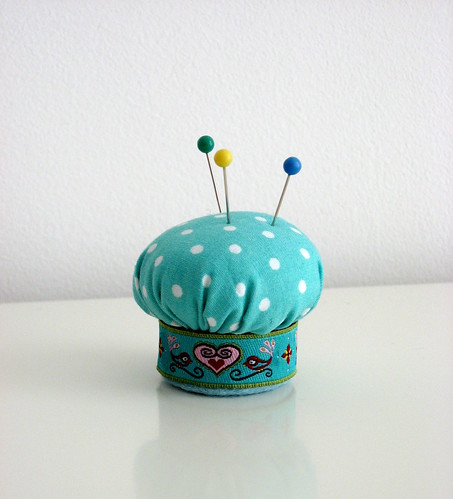
Tiny Pin Cushion


I'd had the pin cushion tutorial bookmarked for ages, but I never had any stuffing on hand before, so I never made one. It was pretty instant gratification aside from the fact that I used regular craft glue since I don't have a hot glue gun. The glue did sort of soak through the trim in a couple places, so I'd probably try to use a minimal amount if I did it again. I'm not sure whether or not this is an issue with the hot glue. I do love its adorable mushroom shape and it's been useful already since I'm on a bit of a sewing spree lately.

Photographs and artwork by Allison Gryski. © All rights reserved.

29 January 2011

Amsterdam Fabric Stash


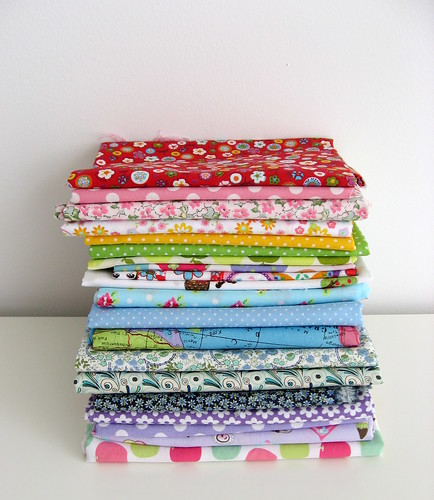
Stack of Amsterdam Fabrics


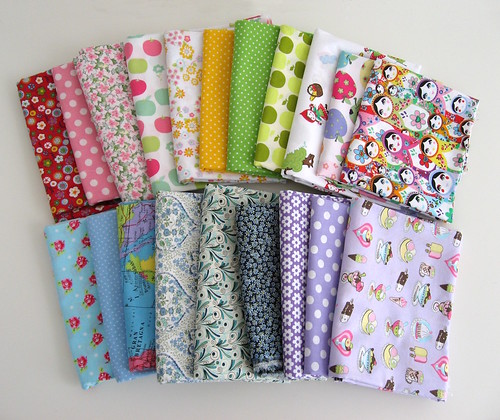
I tend to buy fabric I love when I see it, but because I don't want to be spendthrift, usually only a quarter to half a metre at a time (unless I have a specific project in mind). Thus, I have a stash of many small bits of fabric. It's perfect for things like a patchwork quilt, pillow or bunting. It's also great for fun fabric cubes.


A delightful sight


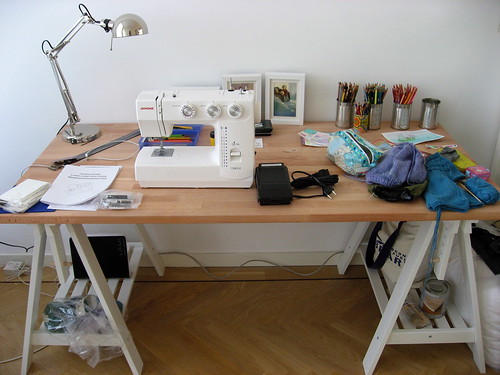
When I bought my sewing machine, I immediately indulged in a little fabric, but typically, I mostly bought more blue fabrics. My stash was skimpy for, well, pretty much everything but blue and I wanted to make cubes of different colours. I used mostly stuff in my stash, but I also bought a few more new bits at the Albert Cuyp Market and the Lapjesmarkt. The Quiltlapjes stall that I usually frequent at the Albert Cuyp market was mysteriously missing that Friday, so instead, I shopped at De Boerenbonthal, a fabric store opposite Jan, the notions store.


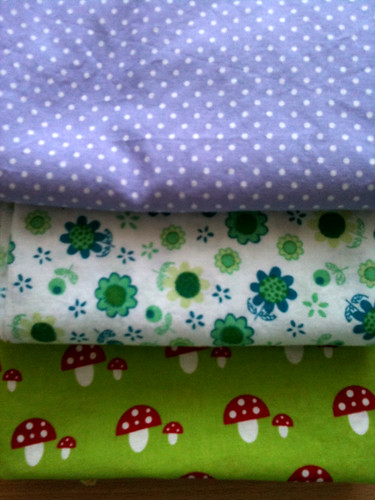
Dotted Fabrics


They had a big selection of polkadot fabrics in one of the side rooms. I love how prevalent dots are in the Netherlands as a pattern (on fabric, but also housewares). They did also have some flannel (which I was looking for the other day), but a grand total of just five patterns and none that I found the least bit compelling.


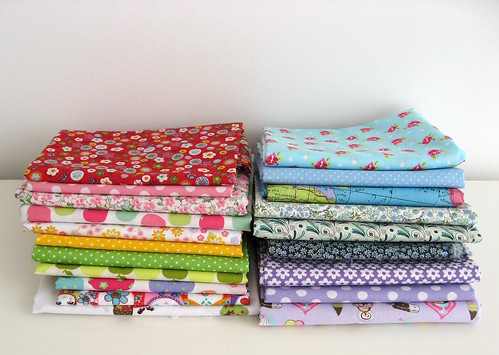
Stacks of Amsterdam Fabrics


On Monday, I returned to the cotton stall in the Lapjesmarkt, and had fun picking out some more new things to expand my stash's colour range. Here is all the fabric I've bought since moving to Amsterdam a little over a year ago:


Amsterdam Fabric Stash


Photographs and artwork by Allison Gryski. © All rights reserved.

27 January 2011

Blocks for Bun

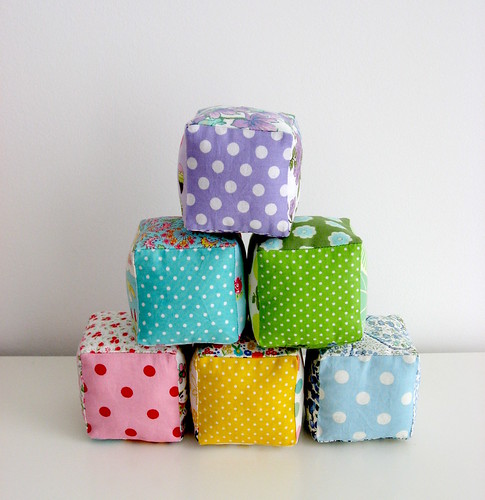
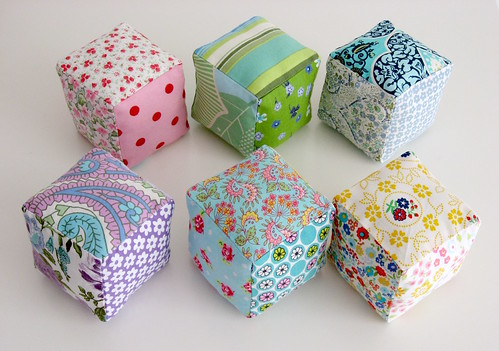
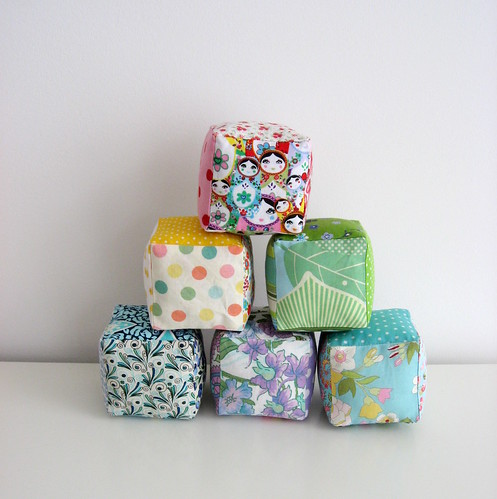
I mentioned the blocks before, when they were in progress. Now that I've done the set, I get to do the ta-da post at last! Following this tutorial, I made six stuffed fabric cubes: one blue, one turquoise, one pink, one green, one yellow, and one purple.


Fabric Blocks


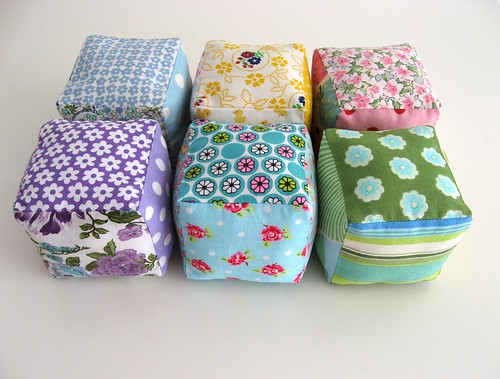
Each cube uses six fabrics, so they're different on every side. I'm hoping that Bun will find the blocks interesting to look at, and later, fun to play with.


Blocks for Bun


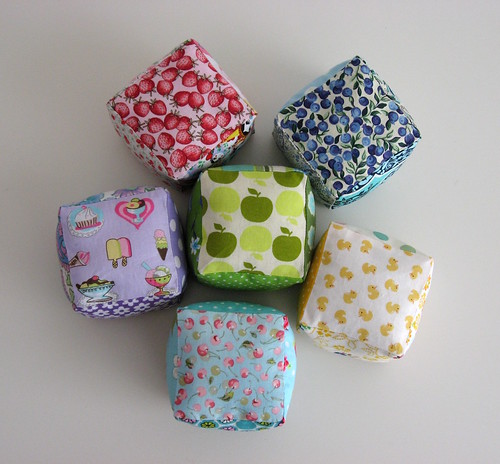
Picking out the different fabrics to compose the cubes was a huge amount of fun. After doing the first couple, I noticed I had some themes going, so I tried to keep that for all the cubes. Accordingly, each block has at least one dotted side and one food side. I originally wanted a fruit side, but I couldn't find any fabrics (locally) for the purple or yellow cubes. Instead, the purple cube got a fun dessert print that I found in several colourways at the Lapjesmarkt, and I stretched my definition of food to include the ducky print, even though they're really more like rubber ducks!


Fabric blocks with food


And just for good measure, here's another picture of some of the other sides. So much fun fabric to play with!


Fabric blocks with flowers


And one more, in pyramid form! Yes, I think I must be nesting to get this excited over some stuffed fabric cubes. But if you have a small person in your life, then these were both simple and fun to make.


Fun Fabric Blocks


Photographs and artwork by Allison Gryski. © All rights reserved.

23 January 2011

Tutorial: How to Sew a Fabric Box

The other day, I decided to make a little fabric box for Bun's dresser, to keep the baby socks tidy. When I went looking for fabric box tutorials, I found a ones that used felt, or quilting, or even some sort of plastic inserts. There were lots of different styles: another felt fabric box, a simple fabric box, another fabric box. But none were quite what I wanted, so I decided to make something up.
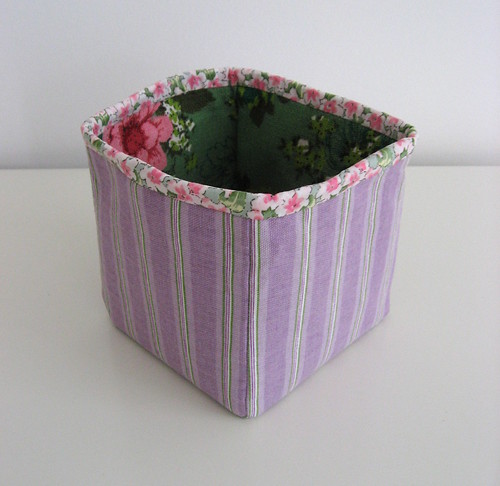

Fabric Box


I wanted to make one using just interfacing (since it's what I had on hand) and I liked the look of this fabric box. I aimed for something similar, using the basic cube construction that I learned from this soft baby cubes tutorial (which I have been using to make some fabric blocks for Bun). I decided to take pictures of the process and write up what worked for me. This will make a 5x5" box.

Materials:
  • 5 squares outer fabric (5.5 x 5.5 inches each)
  • 5 squares lining fabric (5.5 x 5.5 inches each)
  • 10 squares interfacing (5 x 5 inches each)
  • Fabric for binding the edge (3 x 25 inches)


Fabric Box Materials


I mostly used heavier weight fabrics and interfacing for this project. My binding fabric was just regular quilting cotton, though. You may only want one layer of interfacing if the kind you're working with is very thick. You can adjust the size of your box as you like, just make sure the interfacing does not include seam allowance.

Step 1: Iron interfacing to fabric squares
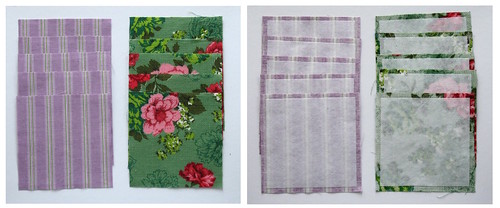

Fabric Box - Step 1


Iron the interfacing squares to the wrong side of all of your fabric squares. Make sure that you've got them centered, with a 1/4" seam allowance all the way around. If you're only using one layer of interfacing, I'd use it on the outer fabric, rather than the lining.

Step 2: Start sewing lining
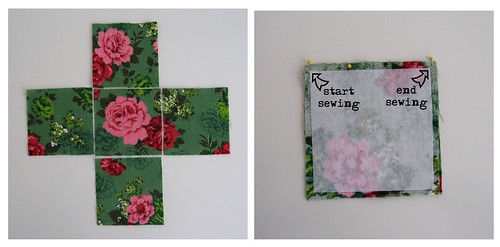

Fabric Box - Step 2a


Lay out your lining pieces in a plus symbol. The center piece will be the inside bottom of your box. If the fabric has a directional pattern, sort out how you want the squares oriented. Next, pin the lower piece to the center piece, right sides together. Now sew that one seam, following the edge of the interfacing. Be sure to start 1/4" in and leave the last 1/4" un-sewn, so your stitches should just be alongside the interfacing. Backstitch at the start and end to secure. Repeat for the upper square, attaching it to the middle square, so you have a strip of three. Press the seams flat (not open!), facing out from the middle square.


Fabric Box - Step 2b


Step 3: Connect the side squares to create plus shape
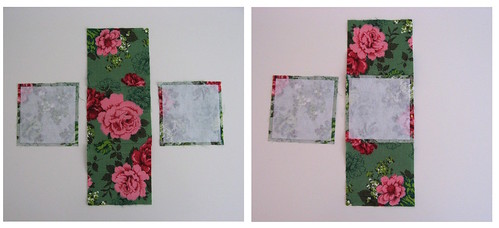

Fabric Box - Step 3a


In the same manner as above, sew the remaining two squares to the middle square, to create the plus shape you laid out. As before, do not sew through the seam allowance. When you're done, the middle square of interfacing should be outlined with your stitching. Press the new seams flat, facing out from the middle square.
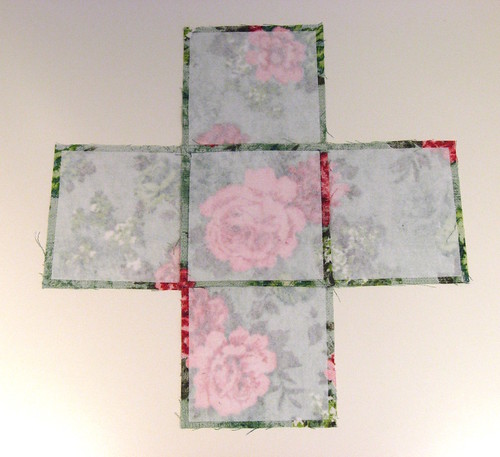

Fabric Box - Step 3b


Step 4: Sew up the sides of the lining
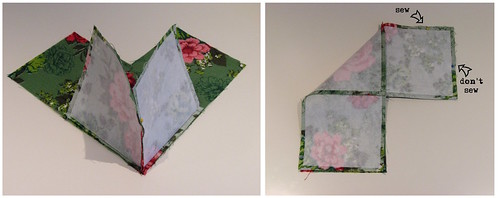

Fabric Box - Step 4


Pick any two of the side squares and lift them up, to begin creating the box shape. Pin them together and sew the seams as before, just following alongside the interfacing, and leaving the 1/4" at the start and end free. I find it easier to sew if I also pin the top edges, so it lays flat. I make sure to use a different pin colour so that I don't accidentally sew that side together! Repeat this for all four sides of the box.

Step 5: Sew outer box and trim seams
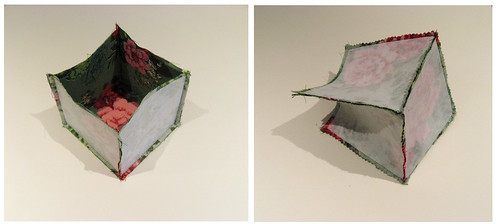

Fabric Box - Step 5


Sew the outer squares together in the exact same manner. I trimmed the seams of the lining with pinking shears and trimmed the bottom corners of both the lining and the outer box to make them fit together more easily.

Step 6: Insert lining into outer fabric box

Fabric Box - Step 6a


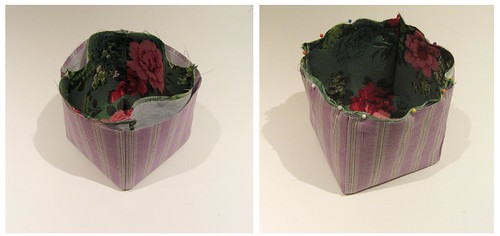
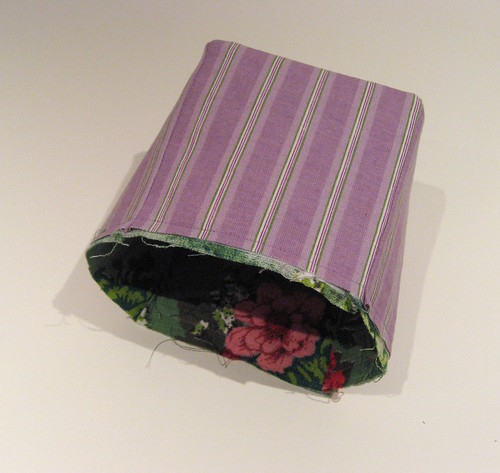
Flip your outer fabric box so that the right side is facing out. Once it was flipped, I ironed a bit along the seams to try to crisp up the square shape. Stuff your lining (with right side still facing in) into the box and fuss with it until the corners are lined up. It will probably still look rippled, like mine did, so pin it all together, then sew a seam along the top edge to hold it snug (this will get covered by the binding in the next step).

Fabric Box - Step 6b


Step 7: Attach binding

Fabric Box - Step 7


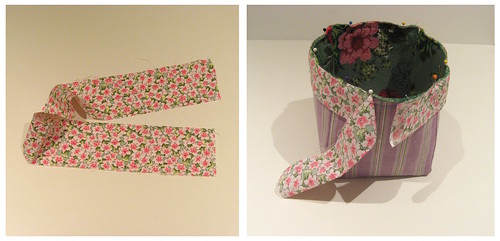
Iron your strip of binding fabric in half lengthwise, then pin it to the upper edge of your box (with the fold along the bottom). I normally follow the quilt binding technique as explained by Heather Bailey. I found I didn't have enough space along the side to do the joining part. Instead, I ironed back one raw edge into the inside of the binding strip, and just tucked the other end of the binding inside that. I then sewed around the whole top edge of the box, using a 1/2" seam.

Step 8: Hand-stitch binding on the inside

Fabric Box - Step 8


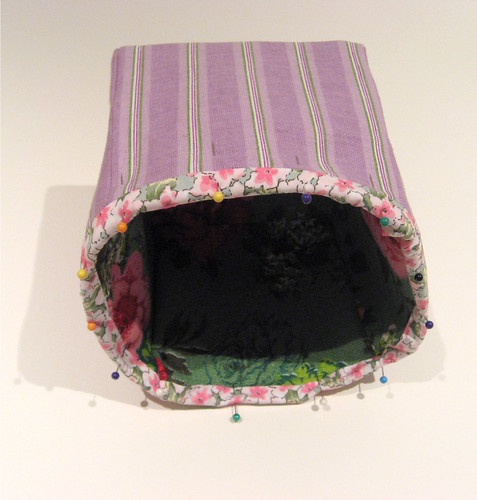
Fold your binding over into the inside of the box, pin it in place, and hand-stitch it down using a ladder stitch. And then you should have a pretty little fabric caddy for storing small odds and ends!

If you make a fabric box following this tutorial, I'd love to see it! Please add your pictures to my flickr group.
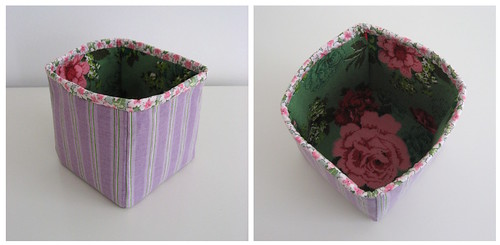

Finished Fabric Box


Photographs and artwork by Allison Gryski. © All rights reserved.