31 January 2011

Re-using my Dotted Fabric


Cube and Pin Cushion


I mentioned that I salvaged the fabric that I'd covered my desk chair in and used some of it in a new project. And here's the "ta da" post! I used a piece for one side of my turquoise fabric cube and another little piece in making a tiny pin cushion. And there's still plenty leftover.


Tiny Pin Cushion


I'd had the pin cushion tutorial bookmarked for ages, but I never had any stuffing on hand before, so I never made one. It was pretty instant gratification aside from the fact that I used regular craft glue since I don't have a hot glue gun. The glue did sort of soak through the trim in a couple places, so I'd probably try to use a minimal amount if I did it again. I'm not sure whether or not this is an issue with the hot glue. I do love its adorable mushroom shape and it's been useful already since I'm on a bit of a sewing spree lately.

Photographs and artwork by Allison Gryski. © All rights reserved.

29 January 2011

Amsterdam Fabric Stash


Stack of Amsterdam Fabrics


I tend to buy fabric I love when I see it, but because I don't want to be spendthrift, usually only a quarter to half a metre at a time (unless I have a specific project in mind). Thus, I have a stash of many small bits of fabric. It's perfect for things like a patchwork quilt, pillow or bunting. It's also great for fun fabric cubes.


A delightful sight


When I bought my sewing machine, I immediately indulged in a little fabric, but typically, I mostly bought more blue fabrics. My stash was skimpy for, well, pretty much everything but blue and I wanted to make cubes of different colours. I used mostly stuff in my stash, but I also bought a few more new bits at the Albert Cuyp Market and the Lapjesmarkt. The Quiltlapjes stall that I usually frequent at the Albert Cuyp market was mysteriously missing that Friday, so instead, I shopped at De Boerenbonthal, a fabric store opposite Jan, the notions store.


Dotted Fabrics


They had a big selection of polkadot fabrics in one of the side rooms. I love how prevalent dots are in the Netherlands as a pattern (on fabric, but also housewares). They did also have some flannel (which I was looking for the other day), but a grand total of just five patterns and none that I found the least bit compelling.


Stacks of Amsterdam Fabrics


On Monday, I returned to the cotton stall in the Lapjesmarkt, and had fun picking out some more new things to expand my stash's colour range. Here is all the fabric I've bought since moving to Amsterdam a little over a year ago:


Amsterdam Fabric Stash


Photographs and artwork by Allison Gryski. © All rights reserved.

27 January 2011

Blocks for Bun

I mentioned the blocks before, when they were in progress. Now that I've done the set, I get to do the ta-da post at last! Following this tutorial, I made six stuffed fabric cubes: one blue, one turquoise, one pink, one green, one yellow, and one purple.


Fabric Blocks


Each cube uses six fabrics, so they're different on every side. I'm hoping that Bun will find the blocks interesting to look at, and later, fun to play with.


Blocks for Bun


Picking out the different fabrics to compose the cubes was a huge amount of fun. After doing the first couple, I noticed I had some themes going, so I tried to keep that for all the cubes. Accordingly, each block has at least one dotted side and one food side. I originally wanted a fruit side, but I couldn't find any fabrics (locally) for the purple or yellow cubes. Instead, the purple cube got a fun dessert print that I found in several colourways at the Lapjesmarkt, and I stretched my definition of food to include the ducky print, even though they're really more like rubber ducks!


Fabric blocks with food


And just for good measure, here's another picture of some of the other sides. So much fun fabric to play with!


Fabric blocks with flowers


And one more, in pyramid form! Yes, I think I must be nesting to get this excited over some stuffed fabric cubes. But if you have a small person in your life, then these were both simple and fun to make.


Fun Fabric Blocks


Photographs and artwork by Allison Gryski. © All rights reserved.

23 January 2011

Tutorial: How to Sew a Fabric Box

The other day, I decided to make a little fabric box for Bun's dresser, to keep the baby socks tidy. When I went looking for fabric box tutorials, I found a ones that used felt, or quilting, or even some sort of plastic inserts. There were lots of different styles: another felt fabric box, a simple fabric box, another fabric box. But none were quite what I wanted, so I decided to make something up.


Fabric Box


I wanted to make one using just interfacing (since it's what I had on hand) and I liked the look of this fabric box. I aimed for something similar, using the basic cube construction that I learned from this soft baby cubes tutorial (which I have been using to make some fabric blocks for Bun). I decided to take pictures of the process and write up what worked for me. This will make a 5x5" box.

Materials:
  • 5 squares outer fabric (5.5 x 5.5 inches each)
  • 5 squares lining fabric (5.5 x 5.5 inches each)
  • 10 squares interfacing (5 x 5 inches each)
  • Fabric for binding the edge (3 x 25 inches)


Fabric Box Materials


I mostly used heavier weight fabrics and interfacing for this project. My binding fabric was just regular quilting cotton, though. You may only want one layer of interfacing if the kind you're working with is very thick. You can adjust the size of your box as you like, just make sure the interfacing does not include seam allowance.

Step 1: Iron interfacing to fabric squares


Fabric Box - Step 1


Iron the interfacing squares to the wrong side of all of your fabric squares. Make sure that you've got them centered, with a 1/4" seam allowance all the way around. If you're only using one layer of interfacing, I'd use it on the outer fabric, rather than the lining.

Step 2: Start sewing lining


Fabric Box - Step 2a


Lay out your lining pieces in a plus symbol. The center piece will be the inside bottom of your box. If the fabric has a directional pattern, sort out how you want the squares oriented. Next, pin the lower piece to the center piece, right sides together. Now sew that one seam, following the edge of the interfacing. Be sure to start 1/4" in and leave the last 1/4" un-sewn, so your stitches should just be alongside the interfacing. Backstitch at the start and end to secure. Repeat for the upper square, attaching it to the middle square, so you have a strip of three. Press the seams flat (not open!), facing out from the middle square.


Fabric Box - Step 2b


Step 3: Connect the side squares to create plus shape


Fabric Box - Step 3a


In the same manner as above, sew the remaining two squares to the middle square, to create the plus shape you laid out. As before, do not sew through the seam allowance. When you're done, the middle square of interfacing should be outlined with your stitching. Press the new seams flat, facing out from the middle square.


Fabric Box - Step 3b


Step 4: Sew up the sides of the lining


Fabric Box - Step 4


Pick any two of the side squares and lift them up, to begin creating the box shape. Pin them together and sew the seams as before, just following alongside the interfacing, and leaving the 1/4" at the start and end free. I find it easier to sew if I also pin the top edges, so it lays flat. I make sure to use a different pin colour so that I don't accidentally sew that side together! Repeat this for all four sides of the box.

Step 5: Sew outer box and trim seams


Fabric Box - Step 5


Sew the outer squares together in the exact same manner. I trimmed the seams of the lining with pinking shears and trimmed the bottom corners of both the lining and the outer box to make them fit together more easily.

Step 6: Insert lining into outer fabric box


Fabric Box - Step 6a


Flip your outer fabric box so that the right side is facing out. Once it was flipped, I ironed a bit along the seams to try to crisp up the square shape. Stuff your lining (with right side still facing in) into the box and fuss with it until the corners are lined up. It will probably still look rippled, like mine did, so pin it all together, then sew a seam along the top edge to hold it snug (this will get covered by the binding in the next step).


Fabric Box - Step 6b


Step 7: Attach binding


Fabric Box - Step 7


Iron your strip of binding fabric in half lengthwise, then pin it to the upper edge of your box (with the fold along the bottom). I normally follow the quilt binding technique as explained by Heather Bailey. I found I didn't have enough space along the side to do the joining part. Instead, I ironed back one raw edge into the inside of the binding strip, and just tucked the other end of the binding inside that. I then sewed around the whole top edge of the box, using a 1/2" seam.

Step 8: Hand-stitch binding on the inside


Fabric Box - Step 8


Fold your binding over into the inside of the box, pin it in place, and hand-stitch it down using a ladder stitch. And then you should have a pretty little fabric caddy for storing small odds and ends!

If you make a fabric box following this tutorial, I'd love to see it! Please add your pictures to my flickr group.


Finished Fabric Box


Photographs and artwork by Allison Gryski. © All rights reserved.

21 January 2011

Tutorial: How to Reupholster an IKEA Desk Chair

The IKEA Stefano chair is an affordable desk chair, but "cute" it is not. Here's how to reupholster it with fabric that appeals to you. I actually did this chair makeover project nearly 3 years ago now, but I only shared it as a "photo tutorial", and I find tutorials are easier to follow in the format of a blog post.


Chair Before & After


For obvious reasons, this IKEA chair didn't make the cut of things to either ship or store when we moved overseas, but I did remove the fabric to reuse later (coming soon on a new project!). Your fabric will have some holes in it obviously, but if necessary (like, say, you want to sell the chair, but not your fabric), you can remove your fun fabric and the chair is still usable, with its original covering.

Materials and Tools:
  • Fabric (I had 24 inches of a 45 inch wide fabric)
  • Scissors
  • Hammer
  • Staple gun and staples
  • Pliers (for pulling out staples)
  • Screwdrivers (I used a flat head for prying out staples, and a Phillips for (dis)assembling the chair)


The Tools


Step 1: Remove chair back


Chair Back Removed

Unscrew the knob until you can slide the chair back up and off the chair.


Step 2: Dismantle chair back


Chair Back Dismantled

Unscrew the knob completely then pry the plastic back off. I found it easier to pry the top out first, but it was still quite a lot of yarding on it to get it to pop off.


Step 3: Lay out and cut fabric


Laying out the Pieces

Unscrew the chair seat too, then lay out the pieces on your fabric. I had just over half a metre (24 inches) of fabric from a 45 inch wide bolt. You might need more with some fabric patterns. Check that you have enough to pull round before you cut your fabric between the two chair pieces.


Step 4: Re-cover chair back


Covering the Chair Back

Starting with the chair back, staple top, bottom, and each side. Then gather in the corners and slowly add more staples, working around the chair to keep the tension even from all sides.


After First Staples

This is what the front looks like after the first staples. Pull taut on each new staple to end up with a smooth result.


Step 5: Gather corners


Gathering the Corners

This is the worst part... gathering in the corners. I have no good technique other than fiddle about until it looks ok, then staple. And it's a good thing the staples come in packs of 1000 because a lot didn't go in completely and I had to pull them out again with some pliers. Others I could bash in with a hammer. A heavy duty staple gun probably would have worked better.


The Finished Chair Back

Here's Stefano with the new chair back. You can see from the back that some of the gathers are visible, but the front is smooth.


Step 6: Re-cover chair seat


Stefano's Seat

You do the seat in the same manner, except that you first have to pry out the staples in the fabric bit that covers the mess underneath. Set aside the cover to staple on again when you're done the bottom.


Finishing the Seat


Step 7: Re-assemble chair


Re-assembling the Seat

It's easiest to re-attach the seat base by setting everything on a table.


Detail of Wrinkles

It's not perfect, but you hardly notice unless you bend down to look at the edge.


Step 8: Ta-dah!


Stefano the Chair After

Admire your new chair!

If you re-cover your desk chair following this tutorial, I'd love to see it! Please add your pictures to my flickr group.

Photographs and artwork by Allison Gryski. © All rights reserved.

18 January 2011

3 Things for Expats to put in their Suitcases

The other day, I posted some advice to expats moving to the Netherlands. It was focused on things about living in Holland that are helpful to know before or immediately after arriving. But then I realised that the other big piece for new expats is wondering what to bring in your luggage. There are some things that you might be tempted to store, or ship, or wait for a friend or relative to bring on a visit. Some of those are worth squishing into your suitcase!


Oddments


1. Pillows
We brought our pillows and even though they took up quite a bit of suitcase space, it was so worth it. It makes a foreign bed immediately feel familiar and if you're at all picky about the texture of your pillow, I highly recommend it. Getting a good night's sleep is important for dealing with all the stresses of being a new expat. It's fun and exciting of course, but all that paperwork and everything being new can take its toll if you're not well rested.

2. Kitchen Knives
If you like to cook at all, I can guarantee you will not be happy with the quality of knives provided in furnished apartments. Buy a knife roll from a restaurant supply store and put your kitchen knives in your luggage. We shipped ours, thinking that shipping wasn't going to take long, but it ended up being several months before our boxes arrived. In that time we quickly resolved never to be without our own knives again!

3. Music
We packed our iPod and speaker dock, which is admittedly a bit of a luxury to bring, but we've never been sorry. It's quite small and it means we have all our music. Before leaving Canada, we ordered a European style plug from Bose (the maker our speaker dock). The new plug was less than $5 and the transformer was designed for the plugs to be easily interchangeable. We brought it in hand-luggage to be sure it wouldn't be damaged.

What NOT to Pack
The flip side to this list is what NOT to bring. That can be harder as it really depends on where you're going (and where you're leaving). We went from Montreal, a city with a huge temperature range (-30°C to +30°C) to Amsterdam, which has a mild climate (-5°C to +25°C). The result was that we brought way more seasonal clothing than necessary. We were at least smart enough to leave our winter coats behind, but we still brought too much. Of course, we need some for holidaying in other climates (Italy in August!), but much less than for day-to-day living. Remember that part of the adventure is embracing your new country and its culture and the less you bring, the more opportunities and space for the new things you'll discover.

Everyday Comforts
Of course, everyone's priorities and comforts are different, so it can be hard to know in advance which things you'll really wish you had. Remember that for many items, you can probably buy something equivalent on the other end (but keep your destination culture in mind before assuming this!). You might find having a shopping list of wish-I-brought-it items to be just one more stress when you don't know the city or the stores, so think carefully about the things you use everyday. Those will be the items you are likely to miss the most.

If you've ever been an expat, what items do you wish you'd brought (or left at home)?

Photographs and artwork by Allison Gryski. © All rights reserved.

14 January 2011

Advice to Expats Moving to the Netherlands


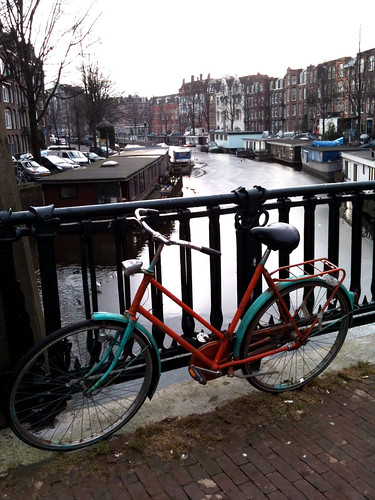
Turquoise and Orange Bicycle


Some friends of friends are also moving from Canada to the Netherlands, so I wrote up some advice based on things I wish we'd known before and immediately after arriving (and good advice that we received). I wanted to put this advice somewhere permanent and where it might help other expats coming to the Netherlands. The only bit that's not specific to moving here is the Expectations section at the end of this post, which I think probably applies to any expat adventure.

Money:
Before you leave home, set up with your bank to be able to remotely transfer money to your new account in the Netherlands and/or bring a substantial amount of money with you because it's standard to pay up to about 4 months rent up front (2 months as a deposit you'd get back, 1 month for the first month, plus 1 month worth as an agent fee if you have a housing agent). We ended up having our parents transfer money to our account, then mailing them a cheque on our Canadian accounts to pay them back because the Canadian banks wanted us to go to our branch IN PERSON to do an international transfer. You will almost certainly get a better rate on euros at your new bank here, so have the conversion to euros happen at this end.

Cheques/bank drafts are not something you will want people to send you for small amounts of money because all banking is done on the internet here and there's a 20-30 euro fee to process a bank draft. Of course, Canada is the reverse, so there's a $30 fee to transfer money internationally (which is fine if you're just doing a big amount to initially set yourself up over here, but otherwise, annoying).

Housing:
See above for upfront costs. I'm not sure how other cities vary, but in Amsterdam, most apartments available for expats are furnished and available 1-2 months in advance at most. So looking for a place to live farther in advance than that is pointless. Very often, places are advertised available "immediately". Unfurnished places seem to be more expensive than furnished because there are fewer available in the expat market. Marktplaats.nl is the "craigslist" equivalent here and what to look at if you want to try to find a place without a housing agent. All the super cheap housing is part of the Dutch social housing scheme and not accessible to expats (and 10+ years waiting list for the Dutch!).

Some good advice we received was to find a nice place for your first place, even if it's a little more expensive because that way if you're homesick or unhappy, at least you're not also stuck in a horrible apartment in a terrible location. It can make a big difference also to the spouse who may not have a job to escape to!

Official Paperwork:
You should expect issues with the following circular dependency: You will need an address (and possibly also your BSN - like a SIN or SSN) in order to open a bank account which you need to have in order to rent an apartment which you need to get a BSN (they require an address). We got out of this loop because Damian's company is large and hires a lot of expats, so they have a special arrangement with the government that new hires can temporarily use the company's address. Many companies will NOT be able to provide this option. I think the way out is to get a provisional lease so you get the address part sorted and can get your bank account and BSN, but your company should be able to advise you on this if you don't have the option of using a temporary address.

In Amsterdam there is the Expat Center which helps you fill out all your paperwork correctly. Depending on your visa status, you may also need appointments with IND (immigration department) and/or an immigration lawyer.

Phone:
The minute you get here, I advise buying a pre-paid mobile phone so that you have a local phone number (or a local SIM card if you already have a phone that will work on the networks here). You will need to do pre-paid before you have a bank account and address, but Vodafone at least will let you convert to a monthly account with your remaining pre-paid credit once you have sorted out the bank account/address thing.

Public Transit:
There is an OV chipcard transit pass that you will probably find useful immediately. It's a debit-style transit pass and it's good on ALL public transit in the whole country, including inter-city trains. There is some personalized one that takes weeks to apply for and needs a picture and blah blah blah, but we prefer using the "anonymous" ones that you can buy immediately and then are not tied to a specific person (the only downside being that if you lose it, then you lose whatever money was on it).

Bicycles:
Buy a used bicycle pretty much right away, regardless of what season you arrive in. Snow and ice rarely stay for more than a week or two at a time. Currently it's 10°C and snow-free and we've been having weather like this for much of January. There is no point to buy a new bike: the good ones are way more expensive and will attract thieves. We spent about 100-150 euro each on our bikes, but that's in central Amsterdam, so you might find something good for less. If you see a new bike in this price range, I would not expect it to be very good quality.

Get the kind with back-pedal brakes, not hand brakes, and definitely no gears necessary! It's very flat here and you really don't need gears. The back-pedal brakes are what we were advised to get and I think it was good advice. Hand-brakes require more maintenance and the ones here seem worse than the ones in Canada (stiffer, less effective, overall lower quality). They are also prone to having the wires tangled or ripped out on bike racks, because the bikes are packed closely and there's often not sufficient room for the handbrakes to fit over the handlebars of the neighbouring bicycles.

Bike theft is a big problem in Amsterdam at least, but you can mostly avoid it if you're careful. Buy a good hefty chain lock, which should cost about 50-60 euro (yes, that's half to a third the price of our bikes!). Just wrap it around under your bike seat when you're riding your bike. Never leave your bike with just the back-wheel lock on (but you'll want one of those too if the bike doesn't already have one installed).

Expectations:
We have been very happy living in the Netherlands, but the expat experience is not always easy. Expect it to take 4-6 months to get through the paperwork and feel settled. Arrange to talk to family and friends on Skype or some other video chat. We have found this a great way to not feel quite so far away from loved ones. Before moving here, we received some great advice on attitude from some friends who are living the expat adventure in New Zealand: There will be things you will miss about home and things you don't like about your new location. If you focus on those things, you will be miserable. Instead, focus on all the things that are better and exciting about your new country and you will be happier and have a lot more fun.

We've certainly had fun this first year: discovering a new city, learning about a new culture, meeting new people (from all over the world), and travelling to other places in Europe.


Photographs and artwork by Allison Gryski. © All rights reserved.

13 January 2011

A Bunny for Bun


Oscar Bunny


For a while, I've been planning to make a stuffed bunny for my little bun-in-the-oven. I found this bunny pattern and it looked like what I had in mind and suited my skill level (which would be zero experience making toys).

All the materials were things I already had on hand. The grey fabric is from the sleeve of a men's thrift store shirt that I used to use as a painting smock. I've named the bunny Oscar for the moment because the shirt was an Oscar de la Renta. Before you get outraged at my cutting up a designer shirt, it wasn't anything fancy ... a 50/50 poly-cotton made in China. The lining of the ears is some fabric I bought here in the Albert Cuyp market.

The pattern is pretty simple, though the instructions could use more detail for beginners like me. I wasn't really sure how to attach the arms and definitely had no idea about embroidering features. For the arms and closing the seams, I ended up using the ladder stitch that I used to bind my quilt. For the features, I used a satin stitch. The one change I made was to add a little filling to the ears before attaching them. I think the legs could have used a wider gap than the pattern gives, because the fabric did end up bunching there, even with the notching. The pattern is split into 4 pages for some bizarre reason. Once I'd taped them together and cut it out, it was clear it would easily fit on a single page, so I have no idea why it's like that.


A bunny for Bun


I asked my friend Barbara about how to hide the ends of the yarn used for embroidering the face. Here's the instructions she gave me:
I do this all the time with my knitted toys. But it's one of those things that's easy to show, and hard to explain in writing (and also much easier to do with knitted toys, compared to fabric ones).

When you want to embroider an eye, for example, take a long piece of embroidery floss. Go into the head somewhere on the head, and have the needle come out where you need to start embroidering. Pull the floss through until you have an end about 4-5" long where you first went in - leave this, you will do something with it later.

Embroider the eye in whatever method you've chosen.

After inserting the needle the last time, have it come out at another place on the head, and pull the floss through. Then carefully go back through the hole just made, trying not to catch the fabric, and come out at another spot on the head. Do this a few more times, then trim off whatever floss is left. The bit of floss sticking out should hide inside if you squish the head a bit. Then you can thread the needle onto the bit of floss you left at the beginning, and secure it in the same manner.

Running the floss ends several times through the head should anchor them securely, without having to leave a knot on the outside. If your floss is dark, and your fabric light, make sure you don't run it too shallow under the fabric, or it will show.

For making something similar in the future, I might try doing the face before closing the side seam. I found that the technique for hiding the embroidery floss did end up bunching the sides of the head a little, and it would be nice to shove a bit more filling in there after finishing that part. In this case, it's part of the charm of a handmade toy and eventually, I'm sure the cuddling (and slobbering) it will get from Bun will even it all out.


Photographs and artwork by Allison Gryski. © All rights reserved.

11 January 2011

Monday Morning Amsterdam Fabric Market


Pretty cottons at the fabric market


On Monday mornings in Amsterdam, there's a fabric and clothing market called the Lapjesmarkt. It runs along Westerstraat and joins up with the Noordermarkt, where there is a little more fabric, some fleamarket booths, and lots of used clothing. At the Lapjesmarkt, there seems to be just about every type of fabric. I saw suiting, fleece, leather, silky and fancy stuff, upholstery/drapery fabrics, linens, and my favourite booth (pictured above) which was filled with tantalizingly fun cottons. There's also several stalls that sell all sorts of fancy trims.

Of course, there did not seem to be anyone selling what I was looking for: flannel. I'll be checking out the fabric stalls and shops in the Albert Cuyp market just in case, but given the array of fabric at the Lapjesmarkt, I'm doubtful whether I'll find any. If anyone knows where to find cute flannel prints (for making cozy baby stuff) in Amsterdam, let me know!

Photographs and artwork by Allison Gryski. © All rights reserved.