
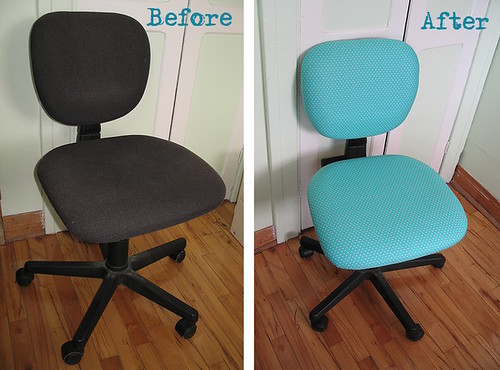
Chair Before & After
For obvious reasons, this IKEA chair didn't make the cut of things to either ship or store when we moved overseas, but I did remove the fabric to reuse later (coming soon on a new project!). Your fabric will have some holes in it obviously, but if necessary (like, say, you want to sell the chair, but not your fabric), you can remove your fun fabric and the chair is still usable, with its original covering.
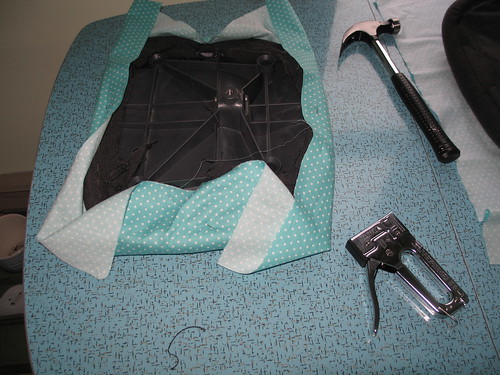
Materials and Tools:
- Fabric (I had 24 inches of a 45 inch wide fabric)
- Scissors
- Hammer
- Staple gun and staples
- Pliers (for pulling out staples)
- Screwdrivers (I used a flat head for prying out staples, and a Phillips for (dis)assembling the chair)
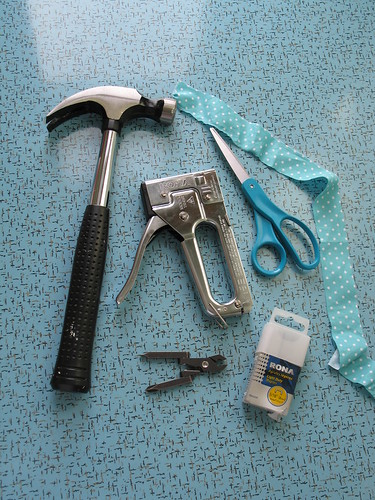
The Tools
Step 1: Remove chair back
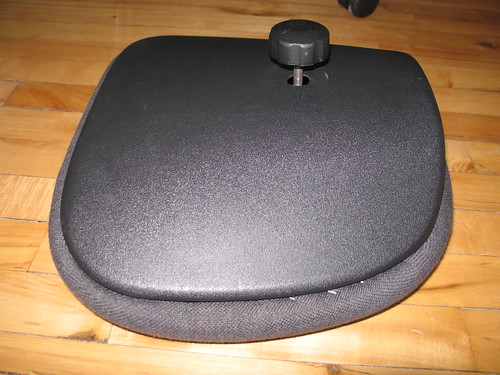
Chair Back Removed
Unscrew the knob until you can slide the chair back up and off the chair.
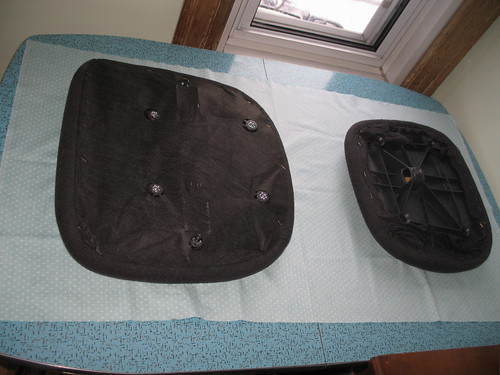
Step 2: Dismantle chair back

Chair Back Dismantled
Unscrew the knob completely then pry the plastic back off. I found it easier to pry the top out first, but it was still quite a lot of yarding on it to get it to pop off.
Step 3: Lay out and cut fabric
Laying out the Pieces
Unscrew the chair seat too, then lay out the pieces on your fabric. I had just over half a metre (24 inches) of fabric from a 45 inch wide bolt. You might need more with some fabric patterns. Check that you have enough to pull round before you cut your fabric between the two chair pieces.
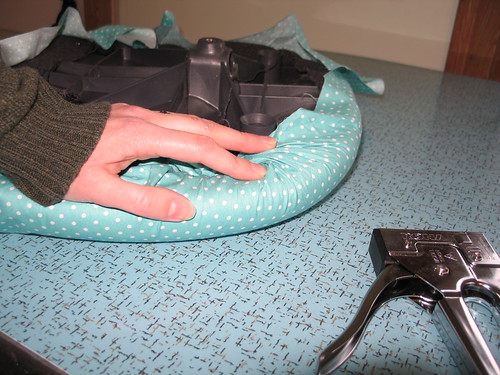
Step 4: Re-cover chair back
Covering the Chair Back
Starting with the chair back, staple top, bottom, and each side. Then gather in the corners and slowly add more staples, working around the chair to keep the tension even from all sides.

After First Staples
This is what the front looks like after the first staples. Pull taut on each new staple to end up with a smooth result.
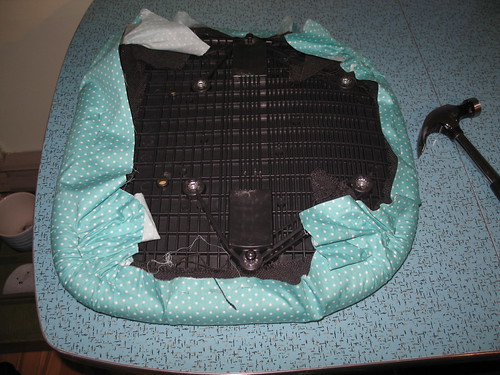
Step 5: Gather corners
Gathering the Corners
This is the worst part... gathering in the corners. I have no good technique other than fiddle about until it looks ok, then staple. And it's a good thing the staples come in packs of 1000 because a lot didn't go in completely and I had to pull them out again with some pliers. Others I could bash in with a hammer. A heavy duty staple gun probably would have worked better.

The Finished Chair Back
Here's Stefano with the new chair back. You can see from the back that some of the gathers are visible, but the front is smooth.
Step 6: Re-cover chair seat
Stefano's Seat
You do the seat in the same manner, except that you first have to pry out the staples in the fabric bit that covers the mess underneath. Set aside the cover to staple on again when you're done the bottom.
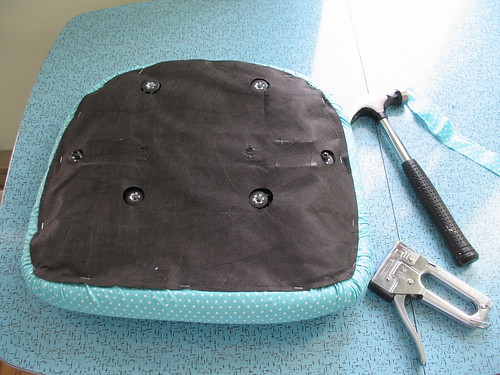
Finishing the Seat
Step 7: Re-assemble chair
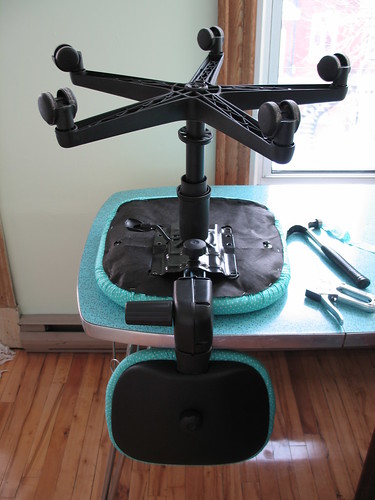
Re-assembling the Seat
It's easiest to re-attach the seat base by setting everything on a table.

Detail of Wrinkles
It's not perfect, but you hardly notice unless you bend down to look at the edge.
Step 8: Ta-dah!
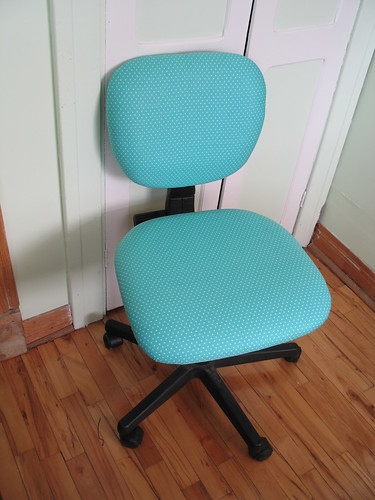
Stefano the Chair After
Admire your new chair!
If you re-cover your desk chair following this tutorial, I'd love to see it! Please add your pictures to my flickr group.
Photographs and artwork by Allison Gryski. © All rights reserved.
3 comments:
Your formica table is so unusual! I've never seen one like it; beautiful!
Ohh, great tutorial! I might need to use this considering we rented an unfurnished apartment! :D
you gave me the confidence to pull the back off the chair. the new fabric comes with a drawstring so i didnt have to mess with the hammer and the staple gun. i guess you can make new covers the same way with a drawstring if you have a sowing machine ;-)
Post a Comment