Showing posts with label amsterdam. Show all posts

12 March 2012

Sea stripes in spring

After finishing the Spring Cloud blanket I had lots of little leftovers, so I started crocheting a simple striped cushion cover. I have to admit that I was seriously tempted to start another blanket right away, but I resisted (for the moment).


Sea stripes


We had about 2 weeks of "winter" here in Amsterdam, with snow and canals that actually froze over, but now it's definitely spring. I saw these lovely crocuses covering a hillside on Sunday.


Field of Crocuses


Photographs and artwork by Allison Gryski. © All rights reserved.

18 March 2011

Spring in Amsterdam

It's definitely spring now, with lots of sunny, warm days, and pretty flowers. Most recently, I've spotted a pink hyacinth, a daffodil, and some snowdrops in bloom. I took a walk in the Vondelpark the other day and took these pictures...


Spring in the Vondelpark

Spring view in the Vondelpark.


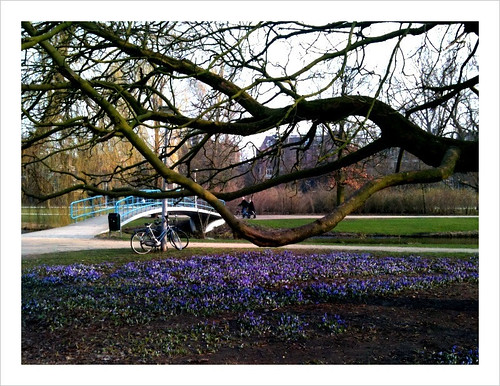
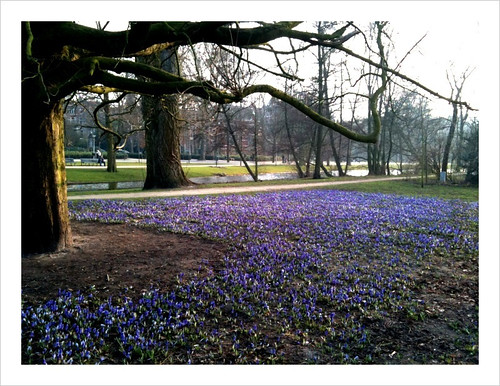
Carpet of Crocuses

A glorious carpet of purple crocuses under this tree.


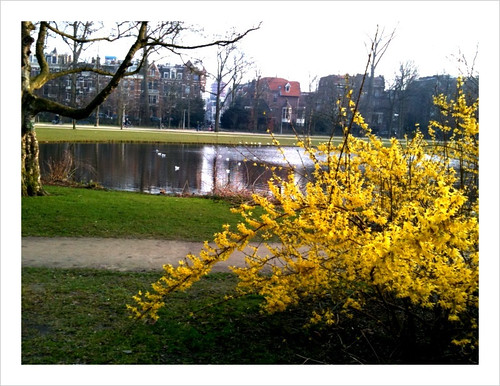
Forsythia in bloom

A bright yellow forsythia in bloom.

Photographs and artwork by Allison Gryski. © All rights reserved.

16 February 2011

A walk in the park


leaning tree


I took a walk in the park today and these are some of the things I saw.


texgtured mossy roots


I don't think I can properly express how much I love spring in February.


tiny bobbly yellow flowers


After years of finding February and March incredibly dreary with that never-ending-winter feeling, I can promise you that I'm not taking the weather in Amsterdam for granted!


draped tree


At my current rather waddling pace, I enjoyed spotting all the different textures in the park.


ropey trees


There's no showy flowers yet to steal one's attention from the subtler details.


spiky seedheads


It was a beautiful day.

Photographs and artwork by Allison Gryski. © All rights reserved.

29 January 2011

Amsterdam Fabric Stash


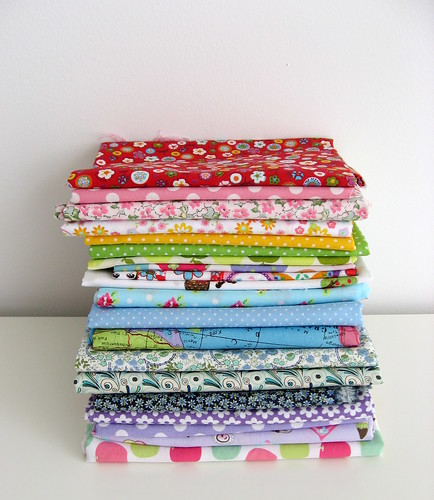
Stack of Amsterdam Fabrics


I tend to buy fabric I love when I see it, but because I don't want to be spendthrift, usually only a quarter to half a metre at a time (unless I have a specific project in mind). Thus, I have a stash of many small bits of fabric. It's perfect for things like a patchwork quilt, pillow or bunting. It's also great for fun fabric cubes.


A delightful sight


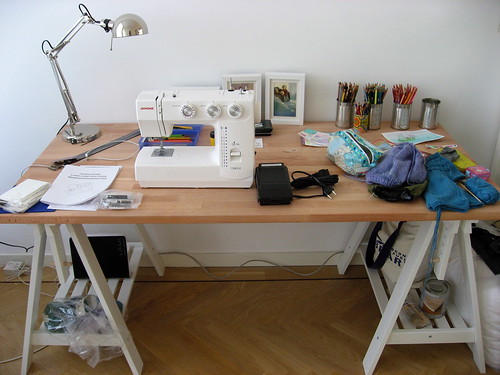
When I bought my sewing machine, I immediately indulged in a little fabric, but typically, I mostly bought more blue fabrics. My stash was skimpy for, well, pretty much everything but blue and I wanted to make cubes of different colours. I used mostly stuff in my stash, but I also bought a few more new bits at the Albert Cuyp Market and the Lapjesmarkt. The Quiltlapjes stall that I usually frequent at the Albert Cuyp market was mysteriously missing that Friday, so instead, I shopped at De Boerenbonthal, a fabric store opposite Jan, the notions store.


Dotted Fabrics


They had a big selection of polkadot fabrics in one of the side rooms. I love how prevalent dots are in the Netherlands as a pattern (on fabric, but also housewares). They did also have some flannel (which I was looking for the other day), but a grand total of just five patterns and none that I found the least bit compelling.


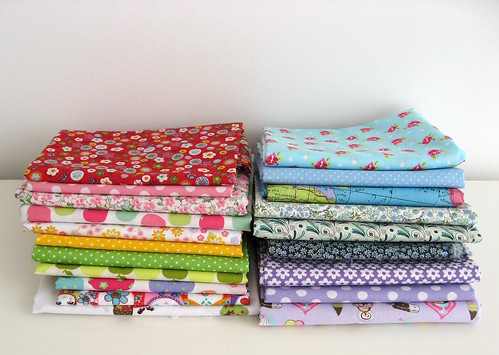
Stacks of Amsterdam Fabrics


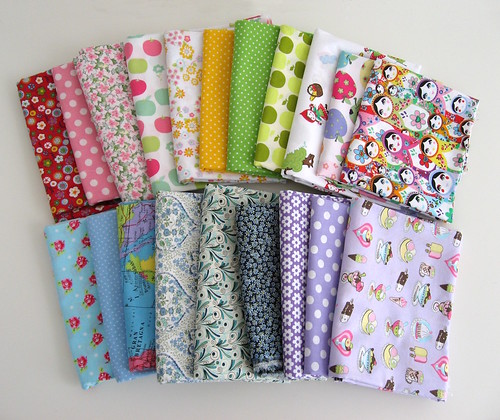
On Monday, I returned to the cotton stall in the Lapjesmarkt, and had fun picking out some more new things to expand my stash's colour range. Here is all the fabric I've bought since moving to Amsterdam a little over a year ago:


Amsterdam Fabric Stash


Photographs and artwork by Allison Gryski. © All rights reserved.

14 January 2011

Advice to Expats Moving to the Netherlands


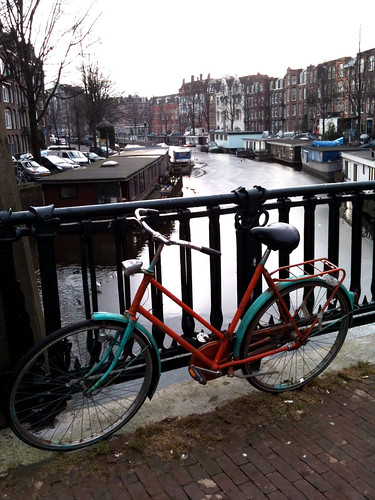
Turquoise and Orange Bicycle


Some friends of friends are also moving from Canada to the Netherlands, so I wrote up some advice based on things I wish we'd known before and immediately after arriving (and good advice that we received). I wanted to put this advice somewhere permanent and where it might help other expats coming to the Netherlands. The only bit that's not specific to moving here is the Expectations section at the end of this post, which I think probably applies to any expat adventure.

Money:
Before you leave home, set up with your bank to be able to remotely transfer money to your new account in the Netherlands and/or bring a substantial amount of money with you because it's standard to pay up to about 4 months rent up front (2 months as a deposit you'd get back, 1 month for the first month, plus 1 month worth as an agent fee if you have a housing agent). We ended up having our parents transfer money to our account, then mailing them a cheque on our Canadian accounts to pay them back because the Canadian banks wanted us to go to our branch IN PERSON to do an international transfer. You will almost certainly get a better rate on euros at your new bank here, so have the conversion to euros happen at this end.

Cheques/bank drafts are not something you will want people to send you for small amounts of money because all banking is done on the internet here and there's a 20-30 euro fee to process a bank draft. Of course, Canada is the reverse, so there's a $30 fee to transfer money internationally (which is fine if you're just doing a big amount to initially set yourself up over here, but otherwise, annoying).

Housing:
See above for upfront costs. I'm not sure how other cities vary, but in Amsterdam, most apartments available for expats are furnished and available 1-2 months in advance at most. So looking for a place to live farther in advance than that is pointless. Very often, places are advertised available "immediately". Unfurnished places seem to be more expensive than furnished because there are fewer available in the expat market. Marktplaats.nl is the "craigslist" equivalent here and what to look at if you want to try to find a place without a housing agent. All the super cheap housing is part of the Dutch social housing scheme and not accessible to expats (and 10+ years waiting list for the Dutch!).

Some good advice we received was to find a nice place for your first place, even if it's a little more expensive because that way if you're homesick or unhappy, at least you're not also stuck in a horrible apartment in a terrible location. It can make a big difference also to the spouse who may not have a job to escape to!

Official Paperwork:
You should expect issues with the following circular dependency: You will need an address (and possibly also your BSN - like a SIN or SSN) in order to open a bank account which you need to have in order to rent an apartment which you need to get a BSN (they require an address). We got out of this loop because Damian's company is large and hires a lot of expats, so they have a special arrangement with the government that new hires can temporarily use the company's address. Many companies will NOT be able to provide this option. I think the way out is to get a provisional lease so you get the address part sorted and can get your bank account and BSN, but your company should be able to advise you on this if you don't have the option of using a temporary address.

In Amsterdam there is the Expat Center which helps you fill out all your paperwork correctly. Depending on your visa status, you may also need appointments with IND (immigration department) and/or an immigration lawyer.

Phone:
The minute you get here, I advise buying a pre-paid mobile phone so that you have a local phone number (or a local SIM card if you already have a phone that will work on the networks here). You will need to do pre-paid before you have a bank account and address, but Vodafone at least will let you convert to a monthly account with your remaining pre-paid credit once you have sorted out the bank account/address thing.

Public Transit:
There is an OV chipcard transit pass that you will probably find useful immediately. It's a debit-style transit pass and it's good on ALL public transit in the whole country, including inter-city trains. There is some personalized one that takes weeks to apply for and needs a picture and blah blah blah, but we prefer using the "anonymous" ones that you can buy immediately and then are not tied to a specific person (the only downside being that if you lose it, then you lose whatever money was on it).

Bicycles:
Buy a used bicycle pretty much right away, regardless of what season you arrive in. Snow and ice rarely stay for more than a week or two at a time. Currently it's 10°C and snow-free and we've been having weather like this for much of January. There is no point to buy a new bike: the good ones are way more expensive and will attract thieves. We spent about 100-150 euro each on our bikes, but that's in central Amsterdam, so you might find something good for less. If you see a new bike in this price range, I would not expect it to be very good quality.

Get the kind with back-pedal brakes, not hand brakes, and definitely no gears necessary! It's very flat here and you really don't need gears. The back-pedal brakes are what we were advised to get and I think it was good advice. Hand-brakes require more maintenance and the ones here seem worse than the ones in Canada (stiffer, less effective, overall lower quality). They are also prone to having the wires tangled or ripped out on bike racks, because the bikes are packed closely and there's often not sufficient room for the handbrakes to fit over the handlebars of the neighbouring bicycles.

Bike theft is a big problem in Amsterdam at least, but you can mostly avoid it if you're careful. Buy a good hefty chain lock, which should cost about 50-60 euro (yes, that's half to a third the price of our bikes!). Just wrap it around under your bike seat when you're riding your bike. Never leave your bike with just the back-wheel lock on (but you'll want one of those too if the bike doesn't already have one installed).

Expectations:
We have been very happy living in the Netherlands, but the expat experience is not always easy. Expect it to take 4-6 months to get through the paperwork and feel settled. Arrange to talk to family and friends on Skype or some other video chat. We have found this a great way to not feel quite so far away from loved ones. Before moving here, we received some great advice on attitude from some friends who are living the expat adventure in New Zealand: There will be things you will miss about home and things you don't like about your new location. If you focus on those things, you will be miserable. Instead, focus on all the things that are better and exciting about your new country and you will be happier and have a lot more fun.

We've certainly had fun this first year: discovering a new city, learning about a new culture, meeting new people (from all over the world), and travelling to other places in Europe.


Photographs and artwork by Allison Gryski. © All rights reserved.

11 January 2011

Monday Morning Amsterdam Fabric Market


Pretty cottons at the fabric market


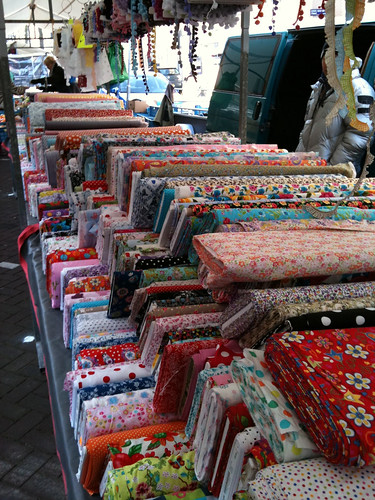
On Monday mornings in Amsterdam, there's a fabric and clothing market called the Lapjesmarkt. It runs along Westerstraat and joins up with the Noordermarkt, where there is a little more fabric, some fleamarket booths, and lots of used clothing. At the Lapjesmarkt, there seems to be just about every type of fabric. I saw suiting, fleece, leather, silky and fancy stuff, upholstery/drapery fabrics, linens, and my favourite booth (pictured above) which was filled with tantalizingly fun cottons. There's also several stalls that sell all sorts of fancy trims.

Of course, there did not seem to be anyone selling what I was looking for: flannel. I'll be checking out the fabric stalls and shops in the Albert Cuyp market just in case, but given the array of fabric at the Lapjesmarkt, I'm doubtful whether I'll find any. If anyone knows where to find cute flannel prints (for making cozy baby stuff) in Amsterdam, let me know!

Photographs and artwork by Allison Gryski. © All rights reserved.

17 December 2010

Snow and Stars


Winter Wonderland


I woke up to a lovely winter fairyland this morning. By the time I was ready to run some errands, it was looking more like this ...


Snowy Day


That photo isn't out of focus -- there's just a white haze from all the big fluffy flakes falling. I was absolutely covered in melting white fluff by the time I got to the grocery store. (Apparently the snow is closing down public transportation ... seems so strange to my Canadian upbringing.) It is so pretty and Christmas-card-like out, though! It has also meant a brighter day, so I took some more pictures of my star garland and stitched them together so you can see the whole thing. (click here to view larger)


Complete Star Garland


In other yarn-related news, the other day I acquired my planned yarn basket when I went to the market. I love having something prettier and more functional that an assortment of plastic bags! Now I've just got to get on with beading my candy cane garland, so that it's ready for tree-decorating on the solstice.


Yarn Basket


Photographs and artwork by Allison Gryski. © All rights reserved.

13 December 2010

Recipe: Gingerbread Cookies

At Christmas time, there are three types of cookies my family always has. Other treats come and go, but the cookies are a constant: gingerbread, shortbread, and cheesies. I am often asked for the recipes, so I thought I'd share them here. Today, I let you in on the secrets of my gingerbread cookies.


Gingerbread cookies


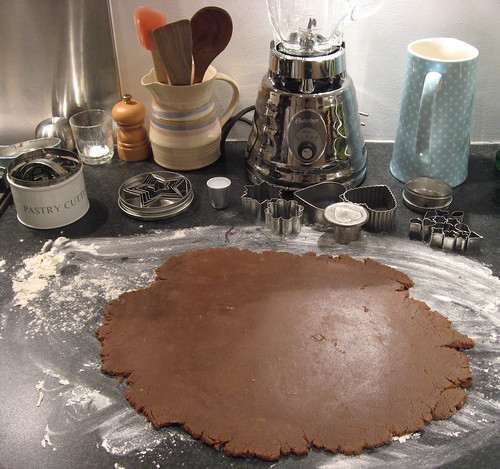
This recipe was the one my Grandfather used to make and the one my Mom always makes. Now it's become my gingerbread cookie recipe too. I grew up with gingerbread people and lots of different animal shapes. My tradition, when I bake them, is lots stars and hearts and ruffled circles with other tiny shapes cut out. I bought a set of super tiny cutters this year to have even more fun cutting out fancy shapes from the bigger cookies. There's a spice shop in the Albert Cuyp market that has tons of super fresh spices and other kitchen odds and ends. I found a little tin of 12 tiny cookie cutter shapes for just a few euros. Much fancy cookie fun was subsequently had!


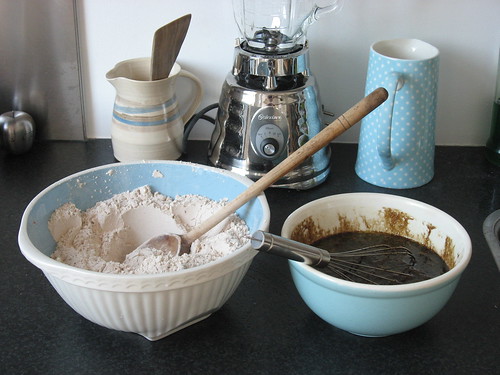
Gingerbread batter


Grandfather's Gingerbread Men

(this is the doubled version, you can safely halve this recipe)

5 1/2 c white flour
1 Tbsp baking powder
1/2 tsp salt
2-3 tsp ginger
2-3 tsp cinnamon
1/2 tsp cloves
1 Tbsp unsweetened cocoa powder

1 1/3 c molasses
2/3 c sugar (technically not a "wet" ingredient, but it goes in with them)
1 c butter, melted
2 large eggs

Combine dry ingredients (while melted butter is cooling). Mix wet ingredients thoroughly, including egg at end. Combine all together and mix evenly to moisten.


Gingerbread batter resting


Chill in plastic bag 2 hours or overnight (allow several hours to warm up if in fridge overnight). Roll out and cut. Bake at 375° F for 10-12 minutes (or at 175° C for 8-10 minutes) on a floured (or parchment paper lined) cookie sheet.


Gingerbread dough


That's the basic recipe, but I'll let you in on the tricks I've learned from my Mom over the years.


Gingerbread dough with shapes


Secret tips
  • Let the eggs warm up to room temperature by whisking them up in a bowl and leaving to sit out.
  • Put the molasses in with the butter and melt slowly in the microwave. The molasses will be much easier to mix this way (but make sure you do it in increments, stirring in between so you don't scorch it). Let it cool a bit before mixing in with the eggs.
  • Make sure your flour isn't too densely packed. I estimate that I used about 840-860g. You can try leaving out half a cup until you see if it's coming together. If you add too much flour, it will be annoyingly crumbly and hard to pack into a ball or roll out.
  • Possibly the most important trick: don't chill the dough in the fridge unless you're not making the cookies until the next day. If it's too cold when you try to roll it out, it will go all crumbly and hard to work with. I just leave it to rest in a bag on the counter for a few hours.
  • Unless you have lots of counter space, only try to roll out half the dough at a time. Put the other half in the bag somewhere cooler since the dough will start to get really warm and too soft to handle once the oven is running.
  • These gingerbread cookies have the perfect blend of softness and crispiness. This does mean you shouldn't try to make a gingerbread house with them, which requires a completely crisp cookie.
Gingerbread cookies cooling
Happy Baking! Photographs and artwork by Allison Gryski. © All rights reserved.
10 November 2010

Cranberry Cottage Pudding

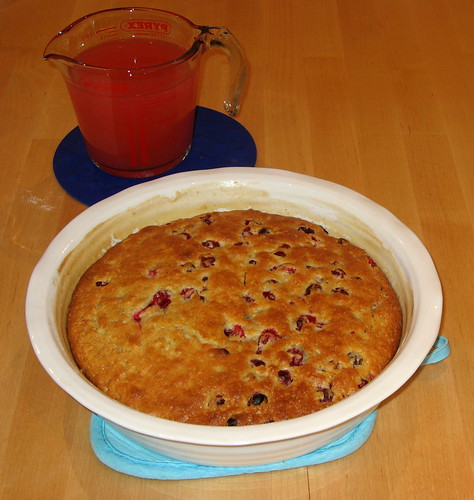
When I was at the Naturwinkel (a local health/organic grocery store) the other day looking for wheat bran and molasses (to make bran muffins), I noticed that they had fresh cranberries. I couldn't resist getting a big bag full to make Cranberry Cottage Pudding! This recipe is something my family tends to make around Thanksgiving particularly, but also sometimes at Christmas. It's best eaten slightly warm and it's oh-so-good the next morning for breakfast.


cranberry cottage pudding


When I got home with my sack of gorgeous cranberries and looked at the recipe I noticed that it called for baking soda. This gave me a bit of pause. So far, I've avoided using baking soda here since it's not a commonly available ingredient. In muffins and cookies, it's usually just to aid browning, not to provide any sort of rising action, so you can safely skip it. But in this cake-y pudding I wasn't sure. I have a gingerbread cake recipe that has only baking soda and once I accidentally used baking powder instead. It was horrible ... the cake stayed like gooey batter and even with loads more cooking time it never "set". It remains one of my few totally inedible baking disasters. So I didn't want to waste ingredients on a similar debacle this time.

I decided to wait a couple days and seek out some baking soda. I ended up resorting to the US and British food store on the Leidsestraat, which had the familiar orange cardboard boxes of baking soda. Baking in a foreign country definitely has its challenges, even once you track down the ingredients. My oven here is about the size of a microwave (in fact, it's also a microwave) and things tend to bake faster. Also, most of my recipes list the temperature in °F, so I have to convert to °C and then account for a convection baking setting.

But on to the recipe!


cranberry cottage pudding


Cranberry Cottage Pudding

Simmer 2 cups fresh cranberries in 2 cups water just until the skins pop.
Drain the berries, saving the cranberry water for the the lemon sauce.

Mix in a large bowl:
  • 1-1/2 cups white flour
  • 1/2 cup white sugar
  • 2 tsp baking powder, 1/2 tsp salt, 1/4 tsp baking soda

In a small bowl, beat together with a fork:
  • 1 egg
  • 1/2 cup milk
  • 1/2 cup melted butter

Add the wet ingredients to the dry and combine. Then gently fold in the cranberries.

Put into a greased and floured 8x8x2" pan (or a round dish like I used).

Bake 30-40 minutes at 400°F (or 190°C for 25 mins if you have a small convection oven). Keep an eye on it the first time you make it, to determine how long it needs in your oven. It should be golden brown on top and a toothpick should come out cleanly.

Lemon Sauce

In a small saucepan, mix together:
  • 1 cup white sugar
  • 2 Tbsp corn starch (mix into sugar)
  • 2 cups of the water used for simmering the cranberries

Stir over low heat to dissolve. Then bring it to a boil, stirring constantly. It should start to change from cloudy to clear(ish) as it heats. Once it comes up to the boil, turn it down immediately, stirring on low heat until it thickens.

Stir in 1/4 cup butter, and the juice and zest of 1 lemon (at least 1 Tbsp peel and 3 Tbsp juice).


cranberry cottage pudding

30 June 2010

I cycle in a skirt


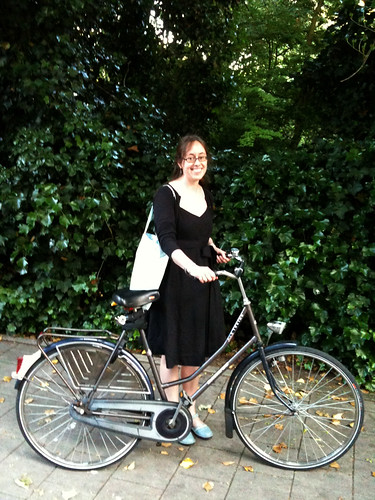
me with my bicycle

One thing Amsterdam is famous for is bicycles everywhere. And it's with good reason. The bicycles are comfortable, the bike paths are plentiful, it's safe and quick, and it's ever so flat. I'm sure I've been spoiled for cycling anywhere else for one thing.

The Dutch-style city bicycle is soooo comfortable. I don't think I've raved about them on my blog as much as I have elsewhere, but I can't resist. The basic shape hasn't changed since the 1920s, and the result is a bicycle that allows proper posture. You're not bent over with arms stretched out, like on a mountain bike. The handlebars come back to meet your hands, just shoulder-width apart and the frame is quite tall. This means, amongst other things, that it's easier to gracefully wear skirts while cycling. Even with my foot on the pedal at its highest point, the height of the frame and my seat still means that my leg slants downward.


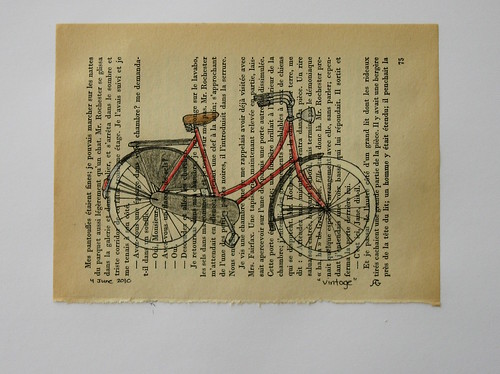
"vintage"


My philosophy for biking in a skirt or dress is largely to just not worry about it; certainly no one else seems to here. I basically get dressed to my own whim, and then just get on my bicycle regardless of what I'm wearing. Two tips to those new to cycling in a skirt: 1) angle your knees inwards, and 2) (this is the biggie) just relax and don't worry about the slight chance that someone might fleetingly see a bit more thigh if the wind is particularly naughty. There seems to be lot of palaver on the internet of people advising wearing shorts underneath or complicated systems of pinning or tying dresses. Now, I can understand some of the discussion of tucking or pinning if you have a full skirt and your bike doesn't have a coat guard, but my impression was mostly that people seem overly worried about someone catching a glimpse of their underwear. To quote Dress A Day, "C'mon, people, are we all six years old? ... Most people wear underwear that is, at minimum, the same coverage as a relatively modest bathing suit."

It's a generalization, but it seemed to be mainly American sites that treated biking in a skirt as a big deal. Maybe it's partly cultural, and maybe it's also that biking as a normal, daily thing just to get somewhere (as opposed to a sporty activity) is not so common in North America. I do wish I could find it again, but there was a site where someone commented that biking in a skirt was maybe not the day to wear your cupcake panties. And my thought was, that's backwards! It's EXACTLY the day to wear your cupcake panties (even though the chances of someone seeing them due to you cycling is actually miniscule). The European attitude largely seems to be confused by the question "how do you bike in a skirt?". Uhhh, you put on a skirt, then you get on a bicycle. And this is the attitude I first adopted when Bixi was launched in Montreal last year. Afterall, if you might just randomly jump on a bike anywhere, you can't really plan what you're wearing.

For reference, I've worn at least 7 different skirts and dresses on my bicycle, of varying lengths and fullness, none with any particular problem. The knee-length, fuller skirted ones are probably the easiest in terms of freedom of movement. But if you're dithering about what to wear on a bicycle, just don't worry. Put on a cute outfit, hop on your bike, and go see the world.

Photographs by Allison Gryski. © All rights reserved.
28 June 2010

Bicycling to the Beach


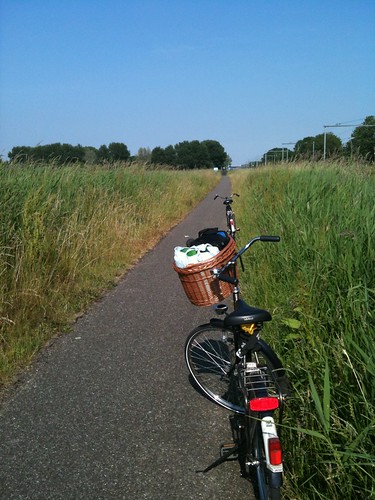
path through the grasses


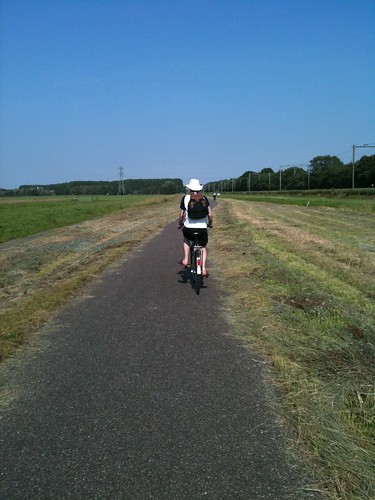
Yesterday we went on an adventure. A 60 km long adventure. We biked from Amsterdam to Bloemendaal aan Zee for the day. We left at 10 in the morning, arrived at the beach around noon, enjoyed the sun, sand, and sea until 5, then biked home, arriving at around 7:30. We spent pretty much exactly the same amount of time cycling as at the beach. Overall, it was a really lovely outing, though the ride back was ... painful. My legs were soooo sore by the time we got home that I just lay on the sofa the rest of the evening. I thought for sure they'd still hurt today, but it turns out not really. I have a funny squiggly sunburn on one arm where I missed applying sunscreen properly, but we otherwise slathered ourselves sufficiently and kept our sunhats on.


the beach!


I have never been particularly sporty, so a 30km cycling trip each way was definitely ambitious. But I wanted to visit the ocean and the weather was forecast to be absolutely glorious, so with a bike route mapped on Damian's android phone, we ventured forth. We marvelled at the lovely bike paths which are kept well away from the roads. Once we were out of the city, it felt like we were just biking through the countryside, with wildflowers, trees, birdsong, and pretty views. While scenic, the route is not uselessly twiddly; it largely followed along the route of the N200. There are also lots of little signposts along the bike route, at each intersection, making it relatively easy to follow (and clear that there are many other routes to follow for future adventures).


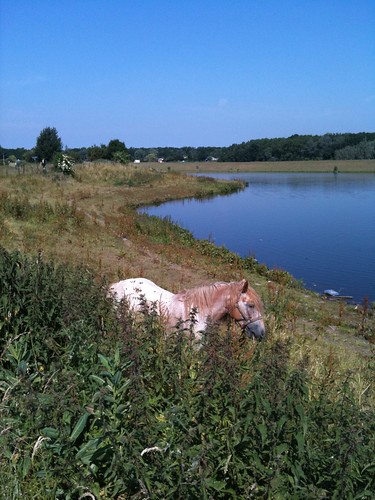
pony by the bike path


We packed ourselves 2 bottles of water and some frozen apple juice boxes and a picnic. The fruit salad (strawberries, mango, and cucumber) was perfect to eat when we first arrived at the beach, tired and thirsty! We had some other classic picnic food like peanut-butter-honey-cinnamon sandwiches, chocolate chip cookies, and bananas.


me biking under the trees


The beach was very busy and quite different from the kind of beach I grew up with. I am used to beaches with more rocks and driftwood, and little crabs and things. This was sand, with bits of shells of course, as far as you could see. The North Sea was chilly, though pleasant to paddle our feet in and let the waves splash our legs. We took advantage of the tractor-pulled food carts on the beach and tried a shrimp sandwich, some deep-fried calamari, and some ice cream bars.


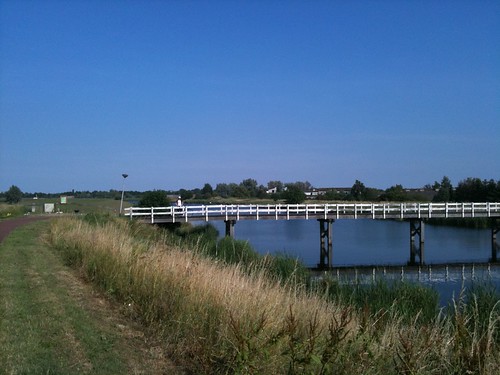
little bridge


When we arrived a noon, there were already lots of people on towels and loungers, but by mid-afternoon, there was a whole new row of towels in front of ours and tons of people playing on the sand. A paddle ball kind of game seemed extremely popular, as was kicking a soccerball, though surprisingly we only saw a couple frisbees. By 5:00, the tide was coming in, and we were ready to head home. I'm not sure if I'd go to this particular beach again as I prefer more rocky bits for exploring and fewer people, but it was a fun adventure, and we only got a little lost on the way back to Amsterdam. (We actually think it made one stretch of the route shorter, though less scenic).


D biking by farmland


Photographs by Allison Gryski. © All rights reserved.
19 June 2010

How to De-Clutter and minimize your "Stuff"


glowy dining room lighting


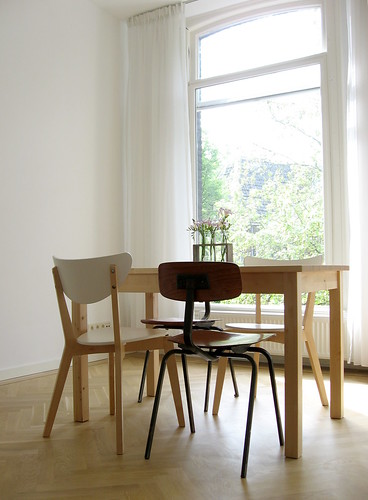
In the spirit of our pre-move decluttering, I've been trying to be good about tossing things out and thinking carefully about what new things to add. One thing I'm doing is not buying things in anticipation of needing them. For example, I haven't bought a toaster yet because we don't usually eat much toast in the summer. When winter rolls around, we'll probably buy one, but for now we just use the broiler in the oven. I do have to fight against my it-might-be-useful-someday tendency in terms of hanging on to things. But it always helps to remember the amount of such stuff that wasn't ever useful that I had to get rid of before we moved. Stuff does have a tendency to multiply in the back of dark cupboards. I want to write down what was actually involved in our pre-move purge before I forget and hopefully it will be helpful to others.


cabinet of curiosities


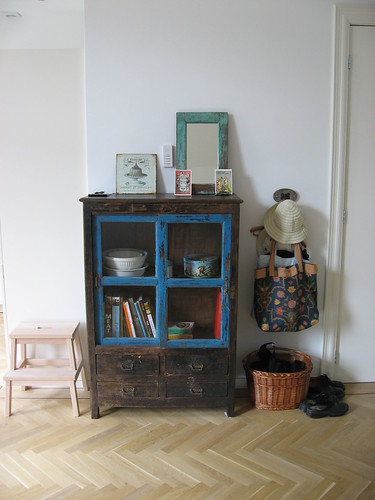
De-cluttering is not a quick job. It takes a lot of mental energy and many iterations. If you try to do it in one pass, you're more likely to make bad choices. If you're rushing it, you'll cling to things you don't need just because you're sick of getting rid of stuff and you'll toss stuff you'll miss just because you're tired of making decisions. Motivation is a huge part of the job. Moving overseas was an excellent inspiration to be more thorough than we had ever been before. If you don't have to minimize your stuff, it will be a lot harder to let go of things. So state your goal clearly to yourself and keep it in mind when evaluating each thing.

My steps for decluttering:
  1. Quickly ditch all the things from the house that you already meant to get rid of (for us this was an old stereo and a box of clothes set aside for the Salvation Army). This should be fast because you've already made the decision, and getting it out of sight will feel like good progress.
  2. Go through the sets of things that you know you can trim down (clothes/shoes, books/movies/music, kitchen housewares, etc) and get rid of anything you don't like or don't use enough to make it worth keeping. The more honest you are about what you don't like or use, the better the results.
  3. Repeat step 2 several times, over the space of several weeks. You need the time so that each time you look at your stuff, you come back to it with fresh eyes. You'll be surprised at the end by things that you kept on the first pass. There are obviously some things that are not frequently used, but are still worth keeping, but it's important to remember that you can borrow things, rent things, and even buy things again if necessary.
  4. Now that you've got the obvious excess trimmed down, go through absolutely everything, starting with one cupboard or drawer at a time. Look at EVERYTHING (including the things you've already gone through several times). If you don't look at it, there's no chance you'll get rid of it. This step is really tedious, but it's also the most likely to turn up things you didn't even realise you HAD! You should have reduced a lot by this point and you might be pretty mentally exhausted. To de-clutter to the fullest extent, there's one more thing to keep in mind: Can I live without it? The key is to acknowledge that you can like and use something and still decide that you'd rather have more space and less stuff than owning that thing. 
  5. The last step is maintenance.  To make all that hard work worth it, you need to keep returning to your evaluating mindset.  Think carefully when acquiring new things, and review the stuff you've kept as your life and activities change.

Throughout the process, be truly honest with yourself about why you're keeping things. I, for example, had a number of pairs of shoes that I liked the look of, but hardly wore because they hurt my feet. I was resistant to getting rid of them, though, because of what they cost. I thought that if I kept them, I might eventually wear them, thus getting some value. In reality all I was getting was hits of guilt for not wearing them every time I saw them. It took me quite a number of decluttering passes to realise this. I was eventually able to "throw them on the fire" as we took to calling the act of tossing things in the box to be donated. It turned out to feel amazing to throw away the guilt that was associated with those shoes.


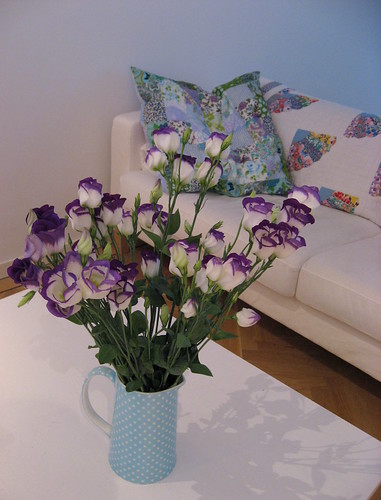
lisianthus in the living room


Photographs by Allison Gryski. © All rights reserved.

18 June 2010

5 months into the Expat Adventure


"ripple"


It's about 5 months into our Grand Adventure and we're definitely feeling more at home. The busy-confused-paperwork stage is mostly over (at least Round 1, let's not be too optimistic) and we've settled into our apartment and a routine. We humans are quite adaptable. While I miss my friends and family (skype is so fantastic!), I love so many things about Amsterdam, that I don't miss Montreal quite as much as I expected.

A few lessons learned that might be helpful to other expats-to-be. Don't expect things you ship to show up in a timely manner. Even though our boxes were only 12 days in transit, all the paperwork and permits and delays meant that it was nearly 4 months before we saw our stuff again. If you want something right away, take it in your luggage. One thing I'm glad was in our luggage (and not our boxes) was our good pillows and the quilt I made. One thing I wish we'd put in our luggage instead of in our boxes was our good kitchen knives. That said, be very careful what you choose to bring since you'll almost certainly make assumptions that you won't even realise you're making.

We shipped some fridge magnets, but don't actually have a magnetic fridge door. At least that was a small mistake. We considered shipping our half-sheet pan and silpat. It's a good thing we didn't since our oven here is teeny... about the size of a microwave. And many of the apartments here apparently don't have ovens at all. Strangely (to us), they all have full-size dishwashers. In Canada, a full-size oven is basically a given, but dishwashers are usually reserved for only the most posh apartments. Another surprise was that furnished apartments are actually the norm for the expat market in Amsterdam and they're cheaper than unfurnished. I'm actually really happy having our own things, but it was a surprise. The up-front cost of renting is also much steeper than in Quebec, where there are no fees or deposits. Here, it's normal to pay an agent fee equivalent to one month's rent, plus 2 months rent as a damage deposit. At least you can expect to get the damage deposit back at the end, but it's still the equivalent of 4 months rent to start!

Overall, despite the stress and paperwork of the beginning, it's a fantastic experience to live somewhere completely new. As my Mom told me throughout our struggles to get everyday life set up, these things are why travel is broadening. And as my husband Damian said, if it was easy, everyone would do it. For everyone who gets the chance, I think you should do it. We've had lots of fun so far and learned a lot. We're both trying to learn Dutch even though almost everyone speaks English and we've definitely taken to the biking culture here. Reflecting on this move has made me ramble on, and I've already edited out 2 other blog posts worth of stuff (which I'll post later). Suffice it to say that moving overseas has given me a lot of experiences to think about.

Photographs by Allison Gryski. © All rights reserved.

08 June 2010

An outing to the Amstelpark


windmill!


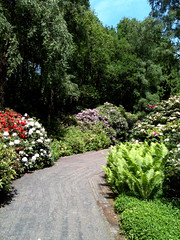
Last Saturday we biked out to the Amstelpark. It was a glorious summer day, sunny and warm, but not too warm. For keeping score on the cheesy-tourist-sights list, we were pleasantly surprised to see an old-fashioned windmill right next to the park. But the real reason we went was that I had read about the park having a showy "Rhododendron valley" and I wanted to see it before the Rhododendrons were done for the year. They were perhaps a bit past their prime, but lots of lovely flowers still to be seen.


The Rhododendron valley is only one small part of the Amstelpark. There are lots of little paths and different types of gardens. Some areas are more cultivated and others seem to be untended woodland.


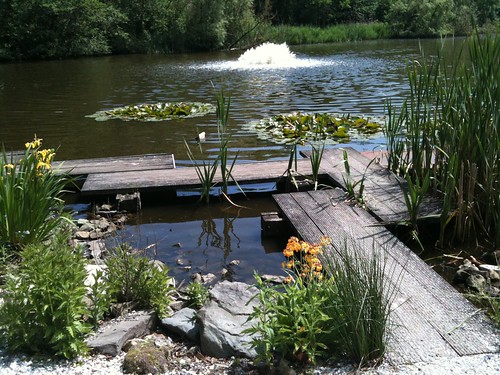
water garden


After some wandering and a visit to the ice cream stall (I had lemon and strawberry), I settled on a bench to draw and read, while D studied Dutch. I did some scribbles of the ducks, but they were mostly moving around too much, so instead I did a drawing assignment based on the word "regal".

"regal"


The park is closed to bicycles and it was much, much less busy than the Vondelpark. These two factors made it a tranquil getaway within the city. We took a circuitous route home and biked up along the Amsteldijk. I'd love to follow the waterway down the other way, since to judge by google maps, we'd quickly be out in farmland. Here are the rest of my photos from our Amstelpark outing.


red poppy


Photographs by Allison Gryski. © All rights reserved.