Showing posts with label crochet. Show all posts

09 September 2012

Making and Travelling

Studio Sundays are still in the mix, but we've also been busy enjoying summer. I started working on a new crochet blanket and I also figured out how to make our laminating machine work. No revolutionary projects from that yet, but I laminated an alphabet card, our "Boots" sign, and a pretend ID card to go in a play wallet.


Confetti Squares

There has also been some more summer holiday travel. We visited Germany for the first time and had lots of fun exploring Bonn and Cologne for a few days.


Along the waterfront in Cologne

Photographs and artwork by Allison Gryski. © All rights reserved.

12 March 2012

Sea stripes in spring

After finishing the Spring Cloud blanket I had lots of little leftovers, so I started crocheting a simple striped cushion cover. I have to admit that I was seriously tempted to start another blanket right away, but I resisted (for the moment).


Sea stripes


We had about 2 weeks of "winter" here in Amsterdam, with snow and canals that actually froze over, but now it's definitely spring. I saw these lovely crocuses covering a hillside on Sunday.


Field of Crocuses


Photographs and artwork by Allison Gryski. © All rights reserved.

05 March 2012

Spring Cloud Ta-Da!


spring cloud blanket


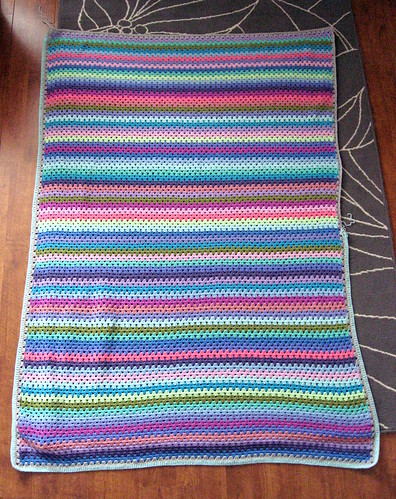
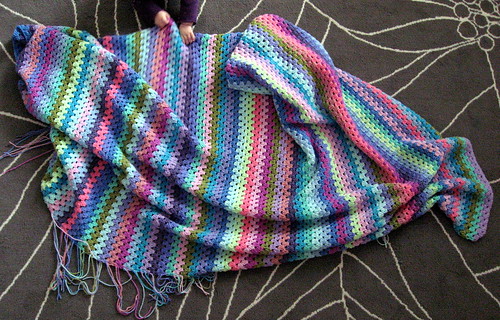
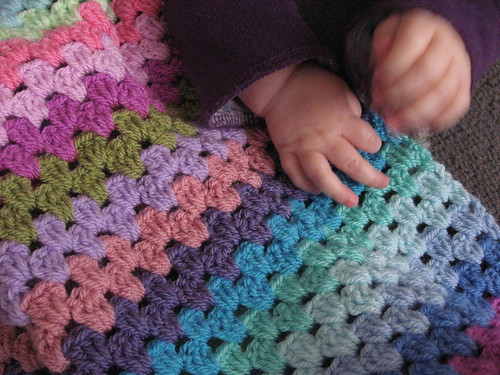
I started the Spring Cloud Blanket just under a year ago, while expecting the Wee Lass. I recently finished it and I'm so pleased with the pretty and cozy result. The Wee Lass likes poking her fingers in the holes. It was a great pattern for a new Mum to work on as it was simple to pick up just for a moment or two.


Wee Lass and her cozy


For the edging, I did a row of double crochet clusters all the way around, plus a row of single crochet in grey. Then I did a row of double crochet in pale blue, followed by a single crochet row in aqua and one in turquoise, then I finished it with a purple picot trim.


cozy with picot trim


Photographs and artwork by Allison Gryski. © All rights reserved.

28 February 2012

At the Edge


Working on the edge


I'm on the last bit of the Spring Cloud Blanket ... the purple picot trim around the very edge of the border. There's something so exciting about that final round.

Photographs and artwork by Allison Gryski. © All rights reserved.

09 February 2012

Border delays and a baby hand

The stripes are all done. I'm quite pleased with how balanced, yet random they turned out. The ends all got woven in and I merrily began the border.


Stripes done, onto the border


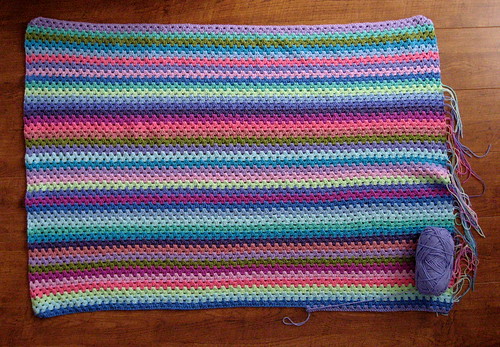
About 70% of the way around with the pale blue, I ran out. Ooops. Borders sure do eat up the yarn at a tremendous rate. So I've ordered some more of it, along with some of the other colours that I plan to use in the border and which had a skimpy amount of yarn leftover. So far I've done a row of double-crochet clusters and single-crochet in pale grey and most of a row of double-crochet in pale blue. I plan to do some turquoise and aqua single-crochet and then end with some purple. I think I've got enough of the purple left so I didn't order more... we'll see if that was wise or not.


border beginnings


It's now on hold as I'm waiting for the yarn to arrive. I've been rather busy looking after the Wee Lass who has been a bit under the weather, in any case. I think I'm still on track to finish the blanket by her first birthday, which was my goal when I started it in the weeks before she was born. I just wanted to smooch this little hand full of kisses, but it probably would have woken her, so I settled for taking a picture.


Sleepy baby hand


Photographs and artwork by Allison Gryski. © All rights reserved.

18 January 2012

Stripey cozy


the striped cozy


As of last night, past when I should have gone to bed, I have finished the body of the Spring Cloud blanket. I've got ends to weave in, and a border to do, but the bulk of it is done. I'm excited about the pretty border now and which colours to pick! The Wee Lass seems to like it already.


the Wee Lass and her cozy stripes


Photographs and artwork by Allison Gryski. © All rights reserved.

24 August 2011

The State of the Stripes


Spring Cloud Aug24


While there have been sneaky peeks, I haven't yet posted a proper progress picture of the Spring Cloud Blanket. So here it is in its current state.

You can see from the top right corner that I've done a bit of weaving in ends, but it's always much more fun to add new stripes than to weave in ends. I'm trying to do some of it as I go though, so I'm not stuck with a massive job at the end! I'm still not sure that I like the bright pink (Fondant) so much, but I suspect the Wee Lass will be glad it's there despite our plans not to inundate her with pink.

Photographs and artwork by Allison Gryski. © All rights reserved.

21 August 2011

Colour Swatches


Spring Cloud Palette


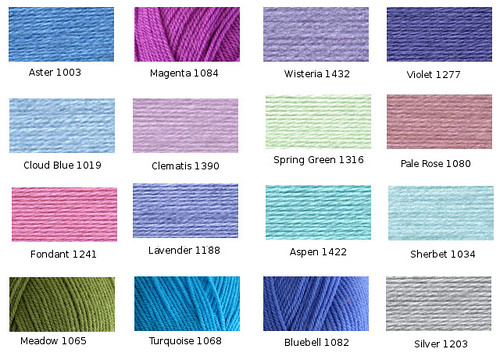
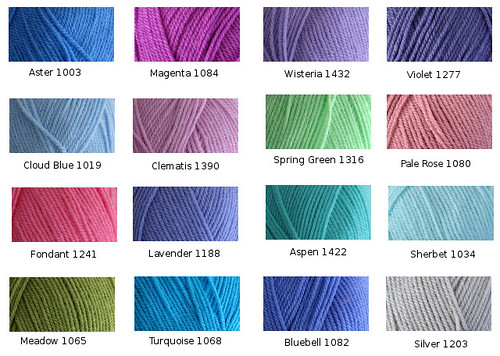
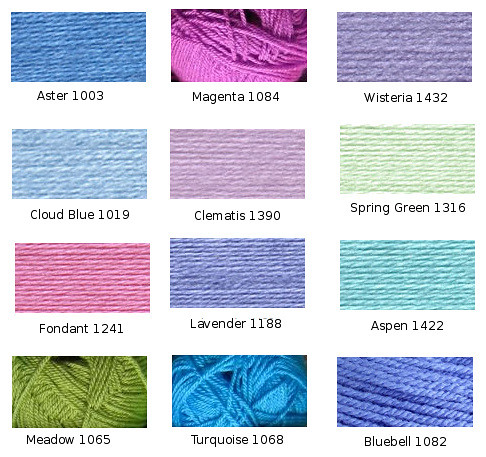
Ordering art and craft supplies online is convenient, but choosing colours can be very tricky. I thought I'd show you the difference between the online swatches and my own colour swatches for the spring cloud blanket. Obviously, part of the issue is that all monitors are slightly different, but I found the colours much more vibrant in real life. (I couldn't find nice swatches online for a few of the colours, so I used my photos in both palettes for those ones).


Spring Cloud Palette (Accurate Colours)


In fact, even my "accurate" photos still look paler than the yarn looks to my eye. And who knows what they'll look like on anyone else's monitor. But I thought it was interesting to compare and I know when I was picking out colours, it was nice to see various people's photos of the yarn to try to get a better idea. The blanket continues along stripe-ily. A long ways yet to go, but I've been averaging a stripe a day recently.

Edited to add: The yarn is Stylecraft Special DK and the colours I have are: Aspen 1422, Aster 1003, Bluebell 1082, Clematis 1390, Cloud Blue 1019, Fondant 1241, Lavender 1188, Magenta 1084, Meadow 1065, Pale Rose 1080, Sherbet 1034, Silver 1203, Spring Green 1316, Turquoise 1068, Violet 1277, Wisteria 1432.

Photographs and artwork by Allison Gryski. © All rights reserved.

12 August 2011

Half-birthday Headband


Headband Flower


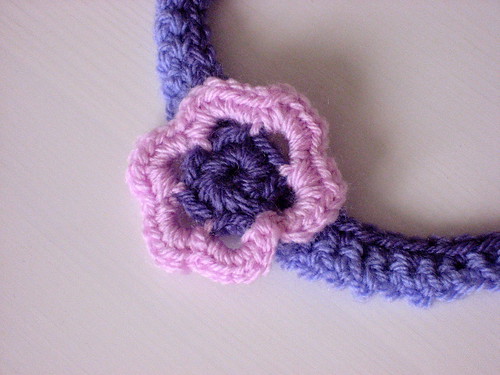
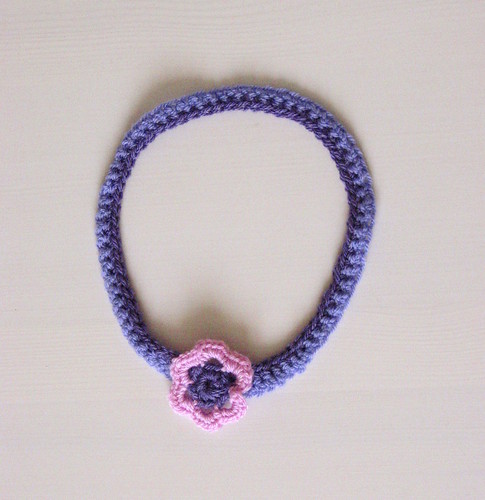
We're going to a little half-birthday celebration tomorrow for another wee lass, so I wanted to take along a small prezzie. The idea for making a headband occurred to me and I found a simple pattern on Ravelry. I love how fast crochet whips together; I spent at most an hour making this (and that includes ripping part of the flower out when I realised that I had made a silly mistake). I can see myself making the flower again for other purposes too. It does seem rather large around, but I stuck with the 6-9 month size because better too big than too small.

For more details, see the project on ravelry.


Headband


Photographs and artwork by Allison Gryski. © All rights reserved.

09 June 2011

Spring Cloud Stripes


Stripes in Progress


A quick in-progress photo of the Spring Cloud blanket. I snapped this with my smartphone camera, so the colours aren't very accurate, but you can see I'm a few more stripes along now (compare to earlier). Part of the recent progress is because I finally figured out how to institute morning and afternoon naps reliably! Any other first-time mamas will know what a triumph that is. Now if only we could figure out how to get more than 5 hours in a row at night...


Photographs and artwork by Allison Gryski. © All rights reserved.

22 May 2011

A little update


I've been busy looking after the Wee Lass and her cute toes. But I have managed to get about 2 more stripes of her Spring Cloud blanket done since she was born. When there's something more to show on the blanket, I'll take a progress photo.

Photographs and artwork by Allison Gryski. © All rights reserved.

21 March 2011

Blankety Beginnings


Blankety Beginnings


I'm still waiting on some of my yarn, but I've started my Spring Cloud blanket for Bun (first mentioned in early March). The looong chain to start the blanket, plus the foundation rows where you're wondering if you got the stitch count right, are a bit tedious. But once you're done that bit, it's very zoomy ... you can watch movies, chat, and let your mind wander while zipping along crocheting little clusters. I'm making the colour stripes at random and just picking colours as I go. It makes for an extra end-of-row treat to choose the next colour.

Photographs and artwork by Allison Gryski. © All rights reserved.

06 March 2011

B is for Baby Bun

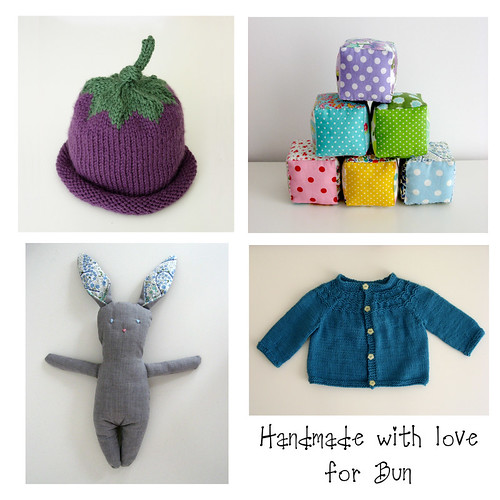
Making special things for an expected little one is one of the lovely bits of "expecting". It's nice to dream of the little person who will wear the tiny garments and play with the toys created during this time of waiting.


Handmade for Bun


The next project in the queue for Bun is a crochet blanket. This led me to realising that all my baby things start with B! There are Blocks, a Bunny, a Blue Sweater, and a Berry Hat! So perhaps it was only natural, that a Blanket was next.


Misty Spring Cloud Yarn Palette


I plan to make a Granny Stripe blanket in misty spring cloud colours. I ordered the yarn online, so I'm hoping it will arrive some time in the next week and that the colours are similar to what I expected. It's a palette I associate with Monet's water lilies ... you might see some similarities with my Monet's Garden Patchwork Pillow.


Monet's Garden Pillow


Seeing some of the water lily paintings in person at the Musée de L'Orangerie was one of the highlights of Paris for me. There are 8 huge, curved murals, in 2 oval rooms, lit by diffuse natural light. You can literally fill your field of vision with the paintings. Something in my soul sings at that soft blue-green-pink-purple palette and the serene quality of the paintings. I actually teared up, it was so beautiful. Truly the museum felt like a sacred space. I only hope my blanket can capture a bit of that beautiful tranquility.


Photographs and artwork by Allison Gryski. © All rights reserved.

22 December 2010

Handmades for the Christmas Tree


Candy Cane Garland


Just in time for tree-decorating on the solstice, I finished beading my candy cane garland yesterday morning. This year's tree is almost entirely decorated with things made by me. I have a couple more little decorations to finish and add, but this is what our Festive Ficus looked like yesterday afternoon.


Festive Ficus


Photographs and artwork by Allison Gryski. © All rights reserved.

17 December 2010

Snow and Stars


Winter Wonderland


I woke up to a lovely winter fairyland this morning. By the time I was ready to run some errands, it was looking more like this ...


Snowy Day


That photo isn't out of focus -- there's just a white haze from all the big fluffy flakes falling. I was absolutely covered in melting white fluff by the time I got to the grocery store. (Apparently the snow is closing down public transportation ... seems so strange to my Canadian upbringing.) It is so pretty and Christmas-card-like out, though! It has also meant a brighter day, so I took some more pictures of my star garland and stitched them together so you can see the whole thing. (click here to view larger)


Complete Star Garland


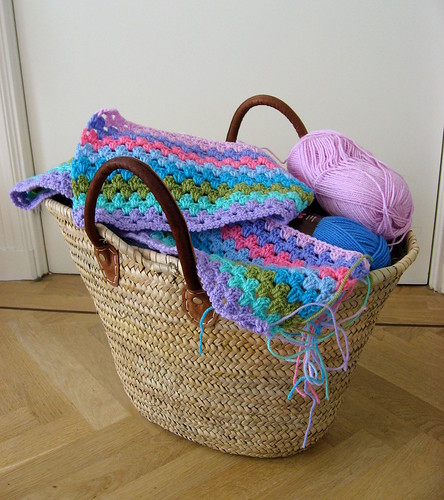
In other yarn-related news, the other day I acquired my planned yarn basket when I went to the market. I love having something prettier and more functional that an assortment of plastic bags! Now I've just got to get on with beading my candy cane garland, so that it's ready for tree-decorating on the solstice.


Yarn Basket


Photographs and artwork by Allison Gryski. © All rights reserved.

16 December 2010

Star Garland Ta-dah!


60 stars


Sixty stars later and I'm finished my star garland! I was really hoping for some sunshine today so I could take a nice photo of it. Unfortunately it's all grey and rainy here. It also turned out to be tricky to fit it all in! So these will have to do...


Finished Garland


Finished Garland


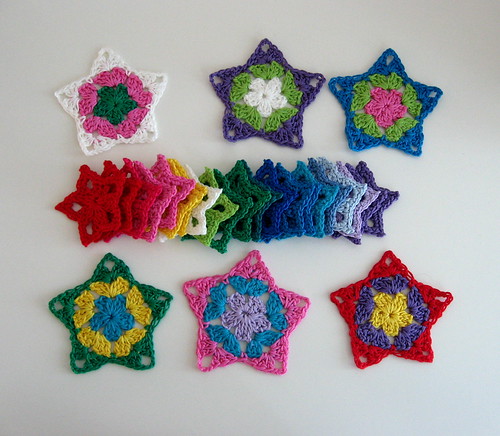
If you'd like to make one of your own, I have a few notes on how I made my garland. I used 15 colours of yarn and for each colour, I did one large star with that as the outer colour. For more details on how I made the large stars, see my Colourful Crochet Stars Tutorial.

I also crocheted 3 small stars with each of the colours, for a grand total of 60 stars. Then I attached them to a chain in the following pattern (where s = small star, l = large star): s, l, s, s, s, l, s, s, s, l, ..., s, s, s, l, s
This will leave you with one small star leftover to turn into an ornament.


white star ornament


The way the stars seemed to be attached in the pattern, results in them having a tendency to hang sideways. I found that the little loop near the top of a point was perfect for adding a loop of yarn for the ornaments, but for connecting to the garland, I instead used a space a little lower.


Where to join a small star


Joining in a small star


To attach the large stars, I went under the chain stitches that form a point. I did 12 chain in between the small stars (as per the pattern), but that was too crowded around the large stars, so there's 15 chain on either side of those. I just did a slip stitch to attach the stars and then continued with the chain.


Joining in a large star


All other yarn and pattern notes are included on my star garland project on ravelry.

If you string a star garland following this tutorial, I'd love to see it! Post your pictures to my flickr group.


Photographs and artwork by Allison Gryski. © All rights reserved.

09 December 2010

Colour!


Lovely Colours


Colour makes me absurdly happy. I love seeing colourful displays of art supplies. Picking out favourites and making arrangements of colours gives me a silly high. I guess it's being a visual person, but sometimes I think it's not normal how excited I get by stack of colourful yarn, fabric, or pencil crayons. (And then I read blogs by other yarn and fabric fanatics and know I'm not alone in my nuttiness).


Pots of Pencils


When I go into an art store, I love looking through the displays of pencil crayons. Pens and paints are also fun to choose, but it's the pencil crayons that always get me most giddy. At the yarn store I love seeing a wall full of luscious colours. Same thing at the fabric store. I'm especially keen on quilting stores where the goodies are arrayed by colour instead of type. Oh and buttons too, of course.


blue button square


Yup, organize a bunch of artsy crafty supplies by colour and I go a bit bananas. That visual stimulation is something I like in small doses in my home, so my current style favours a lot of plain white walls and furniture with my favourite colours introduced through textiles like quilts and cushions. Things I can have the fun of making!


Stacks of Fabric


I love arranging tidy stacks of fabric and pots of colour coordinated pencil crayons. But until recently, I never had too many colours of yarn before. My star garland project changed that and wow was it fun to sit by the shelf of yarn and pick out a rainbow of colours. It was hard to stop. It's been similarly hard to stop crocheting the stars as I keep getting to dip into my stash of yarn to pick out a new colour.


Rainbow Stars


Photographs and artwork by Allison Gryski. © All rights reserved.

07 December 2010

Tutorial: Colourful Crochet Stars

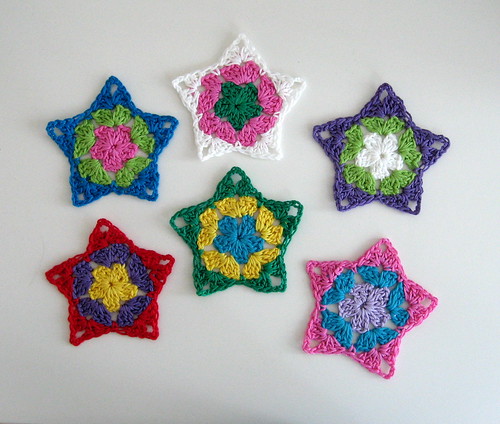
Colouful Crochet Stars


To make the large stars for my star garland, I have been using a slightly modified version of the Grandma Twinkle Stars. The lovely Michelle, who created that tutorial, has graciously given me permission to share my method for making them with 3 colours. I was inspired by the colourful star advent garland over at Attic24.

Techniques you'll need to know:
If you can crochet a granny square then you already know all the techniques you need to make these stars. If not, track down someone to show you because you can probably learn in less than half an hour!! You need to be able to do chain (ch), slip stitch (sl), single crochet (sc), and double crochet (dc). (I am using the American crochet terms, so if you're familiar with British notation, substitute double crochet and treble crochet for where I say single and double. These conversions will be shown in brackets).

My only other crochet project before this star garland was an afghan that was essentially one GIANT granny square. So I've tried to be really detailed for other beginners. There are surely other techniques out there for making these multi-coloured stars. This is what worked well for me.

How to Make Colourful Crochet Stars:

First, pick out 3 delicious colours of yarn to use, plus the hook size specified for your yarn. I'm using a mix of 4 ply and 5 ply cotton yarns, which specify to use a size 2.5mm or 3mm hook.

In your first colour:

Follow the original pattern for the first round.

Now, as per the pattern, you need to slip stitch through the tops of the two double crochet (treble crochet) stitches to get to the next gap. So still in your first colour, do the two slip stitches, but don't do the chain 3 yet. This is when you get out your next colour.
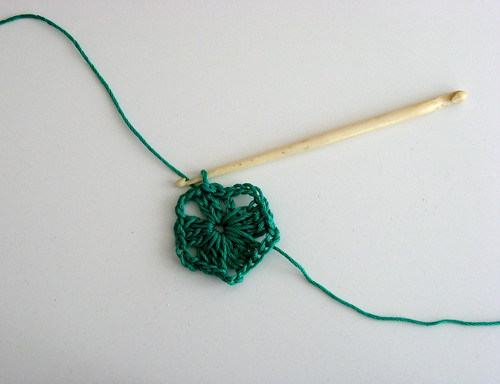
Just Before Colour Switch


In your second colour:

Hold the first colour plus a tail of your new colour out of the way, and hook through a loop of the new colour. Essentially you've just done a chain 1 using the new colour, to make the switch.
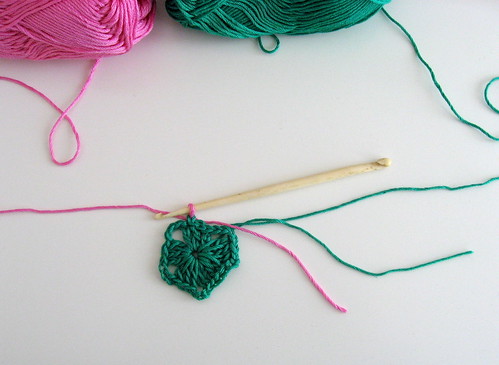
Colour Switch


Now do a single crochet (double crochet) in the gap with your new colour. You can now snip off the first colour, leaving enough of a tail for weaving in later.
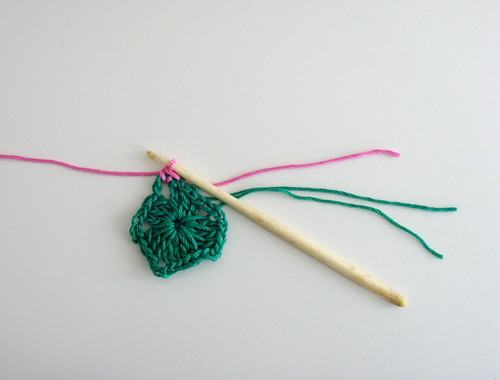
After Colour Switch


Continuing in your second colour, now do the chain 3 and continue with the original pattern for the rest of the second round.

After the end of this second round, you will do the same as before to switch colours.
So do two slip stitches to get to the next gap, then get out your next colour.
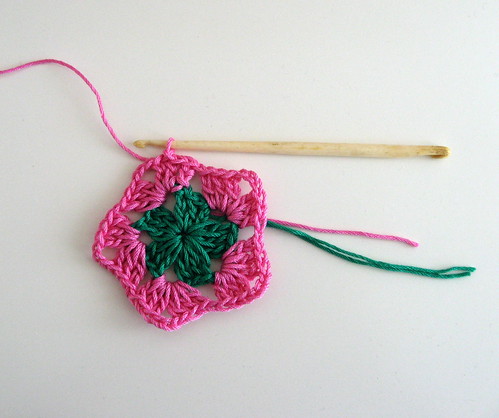
Just Before Next Colour Switch


In your third colour:

Just like before, hold the second colour plus a tail of your third colour out of the way, and hook through a loop of the new colour.
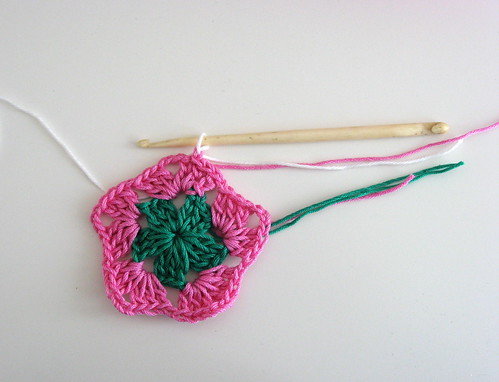
Colour Switch


Now do a single crochet (double crochet) in the gap with your new colour. You can now snip off the second colour, leaving enough of a tail for weaving in later.
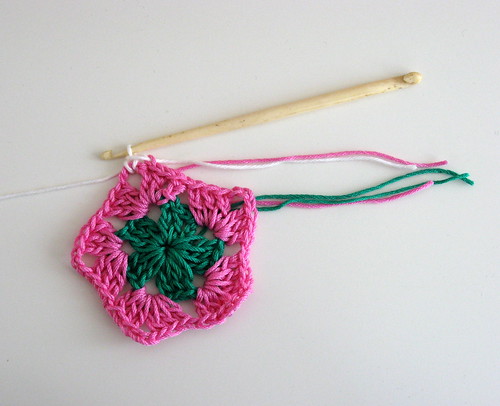
After Colour Switch


Continuing in your third colour, now do the chain 3 and continue with the the original pattern to finish your star.

The tedious part of these colourful stars is all the extra ends to weave in, but they're so cheery!
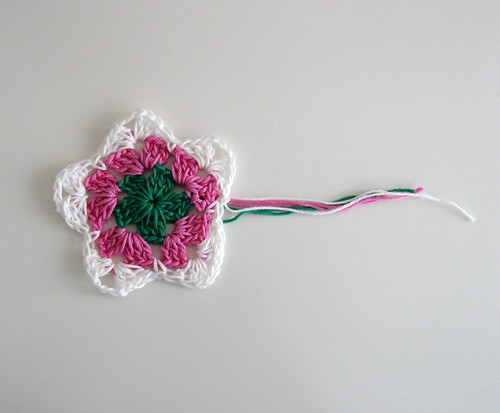
Finishing the Star


After completing a star, I smooth and stretch it out and squish the points to make them pointy instead of round. Then I press it into shape with a steam iron. Now see if you can resist making a stack more stars. I sure couldn't!
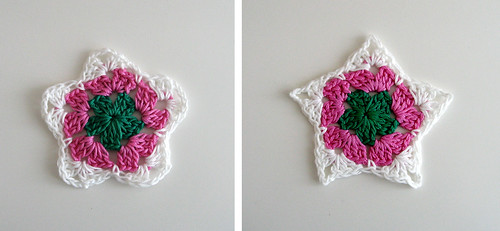
Before & After Pressing the Star


If you make some 3-colour stars following this tutorial, I'd love to see them! Post your pictures to my flickr group.

Photographs and artwork by Allison Gryski. © All rights reserved.